自己用的比较顺手的MCP服务
原创 已于 2026-09-05 02:04:14 修改 · 粉丝可见 · 57 阅读 · 0 · 0 GEO检测 · 编辑
文章链接:https://blog.csdn.net/hacker_51/article/details/163574193
目录
[TOC]
这9个服务覆盖了代码理解、编辑、搜索、数据存储、思考推理、记忆和测试等多个维度,整体搭配思路是合理的。下面我逐个分析,并给出组合建议。
逐条评估
| # |
服务 |
核心能力 |
推荐度 |
说明 |
| 1 |
codegraph |
代码知识图谱(AST解析、语义搜索、调用链追踪、影响分析、死代码检测、HTTP路由追踪) |
⭐⭐⭐⭐⭐ |
让Agent”看懂”代码结构,而非仅靠文本搜索。支持20+语言,Rust内核,自动同步。对大型代码库尤其有价值,能减少约80%的导航tool call。 |
| 2 |
Serena |
符号级代码编辑与检索(find_symbol、insert_after_symbol等)、Shell执行、LSP集成 |
⭐⭐⭐⭐⭐ |
与codegraph互补:codegraph负责”理解”,Serena负责”精准编辑+执行”。支持30+语言,开源免费,是IDE级能力的MCP化。 |
| 3 |
Context 7 |
第三方库文档查询(从源码提取最新文档和示例) |
⭐⭐⭐ |
如果你的Agent经常需要查npm/pypi等库的API文档,很有用。但如果主要处理自有代码,优先级可降。需要API Key。 |
| 4 |
mcp-searxng |
隐私保护网页搜索(基于SearXNG,支持自托管) |
⭐⭐⭐⭐⭐ |
让Agent获取实时信息、查StackOverflow、验证事实。自托管免费,无需API Key,比商业搜索服务更可控。 |
| 5 |
executeautomation/database-server |
多数据库访问(SQLite、PostgreSQL、MySQL、SQL Server) |
⭐⭐⭐⭐ |
如果Agent需要查库、跑SQL、做数据分析,这是基础设施级能力。注意工具数量过多时Claude等客户端可能有限制,可开 --unified-tools 模式。 |
| 6 |
redis-mcp-server |
Redis数据操作(字符串、哈希、列表、集合、流、向量嵌入等) |
⭐⭐⭐ |
适合需要高速缓存、会话存储、消息队列、RAG向量检索的场景。如果Agent不需要这些,可暂缓。建议用官方 redis/mcp-redis 而非社区基础版。 |
| 7 |
server-sequential-thinking |
结构化逐步思考(步骤分解、修订、分支推理) |
⭐⭐⭐⭐⭐ |
官方参考实现,轻量。让Agent在复杂任务中”慢思考”,避免一拍脑袋就动手。对架构设计、故障排查、方案对比等场景价值极高。 |
| 8 |
inkwell-memory |
长期记忆、身份管理、会话上下文、收件箱语义 |
⭐⭐⭐ |
如果Agent需要跨会话记住用户偏好、维护长期上下文,这个很有吸引力(60+工具)。但项目较新,建议先评估稳定性再投入生产。 |
| 9 |
api-testing-mcp |
API测试、验证、负载测试 |
⭐⭐⭐ |
如果Agent的核心任务包含接口测试(如自动化QA、CI/CD集成),这个直接相关。否则属于”锦上添花”,优先级不高。 |
组合建议
核心层(建议必装)
这4个构成了Agent的”大脑+手脚+眼睛”:
codegraph + Serena :代码领域的”理解”与”操作”黄金组合。codegraph解决”代码在哪、怎么关联”,Serena解决”精准改哪、怎么执行”。
mcp-searxng :给Agent装上实时信息获取能力,查文档、查issue、查最佳实践都靠它。
server-sequential-thinking :给Agent装上”三思而后行”的能力,复杂任务不翻车。
数据层(按需加载)
增强层(锦上添花)
CodeGraph (代码地图)
将自己的项目看作地图。Agent的代码知识图谱工具。不会再让Agent自己猜测Controller对应的service的关联,而是精准找到对应的关联,就像有了地图。
安装
下载安装依赖
1
| npm i -g @colbymchenry/codegraph
|
将 CodeGraph 连接到您使用的CLI
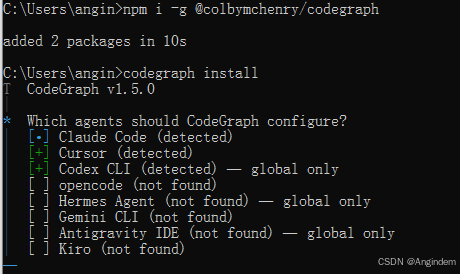
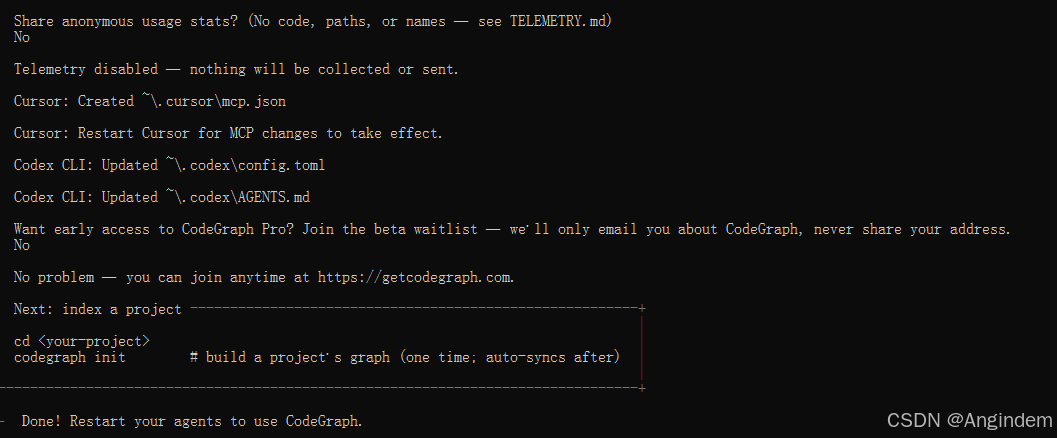
检测并自动配置Claude Code、Cursor、Codex CLI、opencode、Hermes Agent、Gemini CLI、Antigravity IDE 和 Kiro,将 CodeGraphMCP服务器连接到每个工具中。这一步是将 CodeGraph 与你的CLI连接的关键;仅在第1步安装 CLI 并不能完成此操作。该步骤仅连接你的CLI,不会索引任何代码;构建每个项目的图谱需通过第3步的独立 codegraph init 命令来完成。
通过 CC swtich 可以看到多了 codeGraph 的 MCP 服务器。
serena(手术刀精准编辑)
相等于给Agent装一个 IDEA,Agent 可以像正常开发一样,调试监控变量等,理清项目引用关系等等,不会像之前那样拿个记事本一样的去盲目修改代码。
安装
安装 uv 工具
1
| powershell -ExecutionPolicy ByPass -c "irm https://astral.sh/uv/install.ps1 | iex"
|
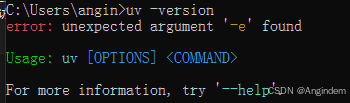
检查 uv 是否已安装:
安装 serena:
1
| uv tool install -p 3.13 serena-agent
|
检查 serena 是否已安装:
注意事项:这是正常现象
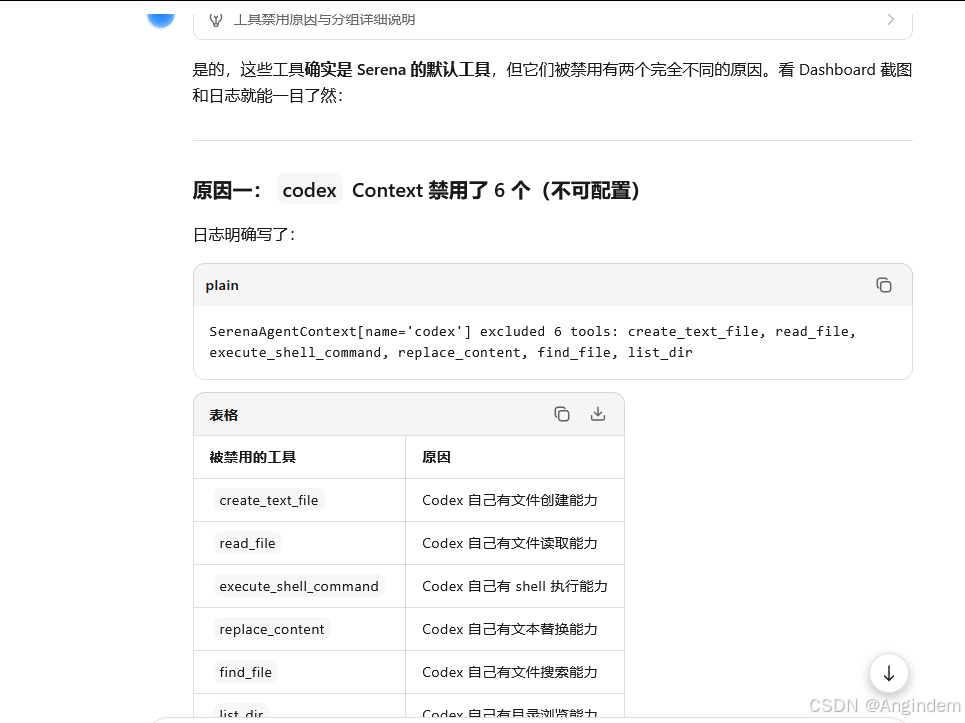
可以使用桌面聊天软件进行MCP服务连接,这样可以调用Serena的文件创建和读取能力。
这里我用的比较顺手的就是 ChatBox v1.21.1 版本的。
mcp-searxng (联网搜索)
给Agent加上可以网页搜索的MCP服务。
这里就要部署 SearXNG MCP 服务器。
官网: GitHub - searxng/searxng: SearXNG is a free internet metasearch engine which aggregates results from various search services and databases. Users are neither tracked nor profiled. · GitHub
1
2
3
4
5
| docker run --name searxng -d \
-p 8888:8080 \
-v "./config/:/etc/searxng/" \
-v "./data/:/var/cache/searxng/" \
docker.io/searxng/searxng:latest
|
修改配置:
1
2
3
4
5
6
7
8
9
10
11
12
13
14
15
16
17
18
19
20
21
22
23
24
25
26
27
28
29
30
31
32
33
34
35
36
37
38
39
40
41
42
43
44
45
46
47
48
49
50
51
52
53
54
55
56
57
58
59
60
61
62
63
64
65
66
67
68
69
70
71
72
73
74
75
76
77
78
79
80
81
82
83
84
85
86
87
88
89
90
91
92
93
94
95
96
97
98
99
100
101
102
103
104
105
106
107
108
109
110
111
112
113
114
115
116
117
118
119
120
121
122
123
124
125
126
127
128
129
130
131
132
133
134
135
| use_default_settings:
engines:
keep_only:
- bing
- bing_images
- bing_news
- bing_videos
- baidu
- baidu_images
- baidu_kaifa
- 360search
- 360search_videos
- sogou
- sogou_images
- sogou_videos
- sogou_wechat
- quark
- quark_images
- bilibili
- acfun
- iqiyi
- yandex
- stackoverflow
- github
server:
secret_key: "EzZVy5xqfE88aruuXbwLMjwvG1CNOMIX"
image_proxy: true
bind_address: "0.0.0.0"
limiter:
enabled: false
search:
formats:
- html
- json
language: zh-CN
locale: zh
outgoing:
request_timeout: 15.0
max_request_timeout: 20.0
enable_http2: false
# 显式启用所有保留的引擎(确保 disabled: false)
engines:
- name: bing
disabled: false
weight: 1.0
timeout: 10.0
- name: bing_images
disabled: false
weight: 0.8
- name: bing_news
disabled: false
weight: 1.0
- name: bing_videos
disabled: false
weight: 0.8
- name: baidu
disabled: false
weight: 1.2
timeout: 10.0
- name: baidu_images
disabled: false
weight: 0.8
- name: baidu_kaifa
disabled: false
weight: 1.0
- name: 360search
disabled: false
weight: 0.8
timeout: 10.0
- name: 360search_videos
disabled: false
weight: 0.6
- name: sogou
disabled: false
weight: 1.0
timeout: 10.0
- name: sogou_images
disabled: false
weight: 0.8
- name: sogou_videos
disabled: false
weight: 0.6
- name: sogou_wechat
disabled: false
weight: 0.8
- name: quark
disabled: false
weight: 1.0
- name: quark_images
disabled: false
weight: 0.8
- name: bilibili
disabled: false
weight: 0.6
- name: acfun
disabled: false
weight: 0.5
- name: iqiyi
disabled: false
weight: 0.5
- name: yandex
disabled: false
weight: 0.5
timeout: 10.0
- name: stackoverflow
disabled: false
weight: 0.8
- name: github
disabled: false
weight: 0.8
|
安装 mcp-searxng MCP 服务
官网: https://github.com/BrandonStudio/SearXNG-MCP
1
| npm install -g mcp-searxng
|
填写 MCP 服务配置:
1
2
3
4
5
6
7
8
9
10
11
12
13
14
| {
"mcpServers": {
"searxng": {
"command": "npx",
"args": [
"-y",
"@bs-mcps/searxng"
],
"env": {
"SEARXNG_URL": "https://your-searxng-instance.com",
}
}
}
}
|
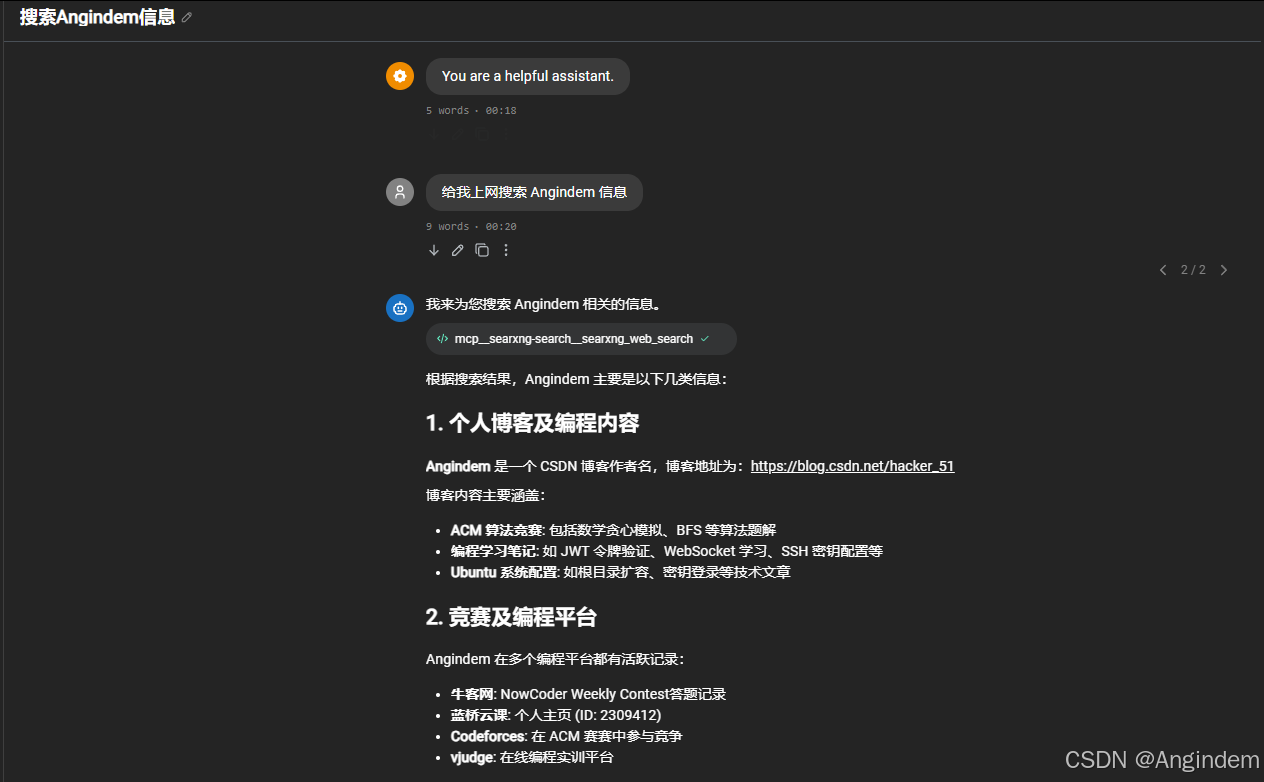
测试结果:
mcp-database-server(通用连接数据库,适用于本地)
官网: GitHub - executeautomation/mcp-database-server: MCP Database Server is a new MCP Server which helps connect with Sqlite, SqlServer and Posgresql Databases · GitHub
给 Agent 连接数据库权限,方便 开发查看数据库表等操作。
安装
1
2
3
4
5
6
7
8
9
10
11
| npm install -g @executeautomation/database-server
|
配置MCP服务器
postgresql
1
2
3
4
5
6
7
8
9
10
11
12
13
14
15
16
| {
"mcpServers": {
"postgresql": {
"command": "npx",
"args": [
"-y",
"@executeautomation/database-server",
"--postgresql",
"--host", "your-host-name",
"--database", "your-database-name",
"--user", "your-username",
"--password", "your-password"
]
}
}
}
|
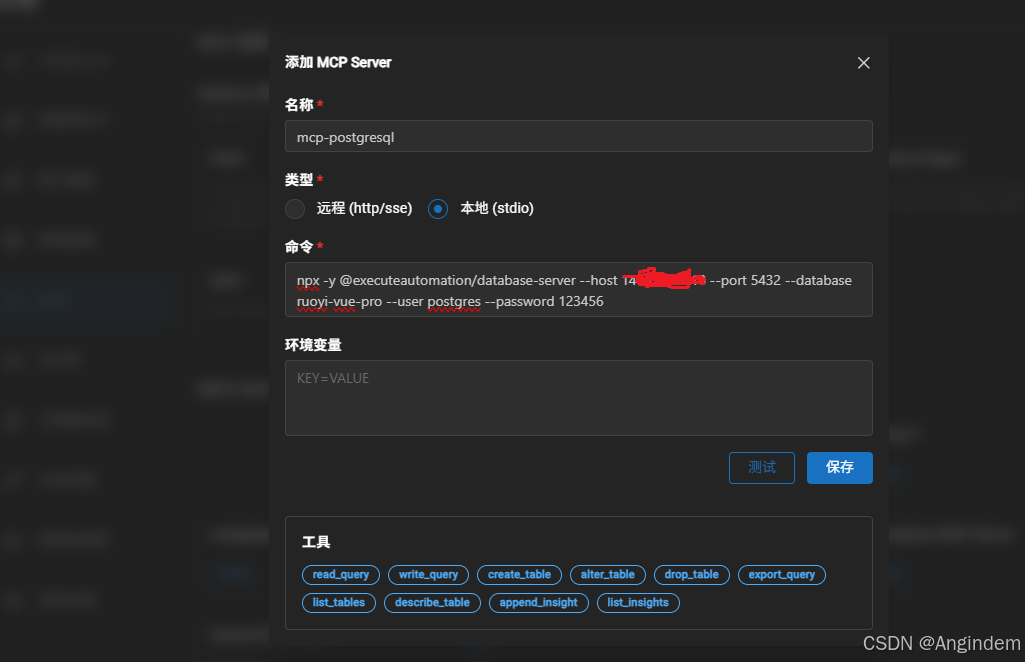
一行运行命令:
1
| npx -y @executeautomation/database-server --postgresql --host 192.168.3.4 --port 5432 --database ruoyi-vue-pro --user postgres --password 123456
|
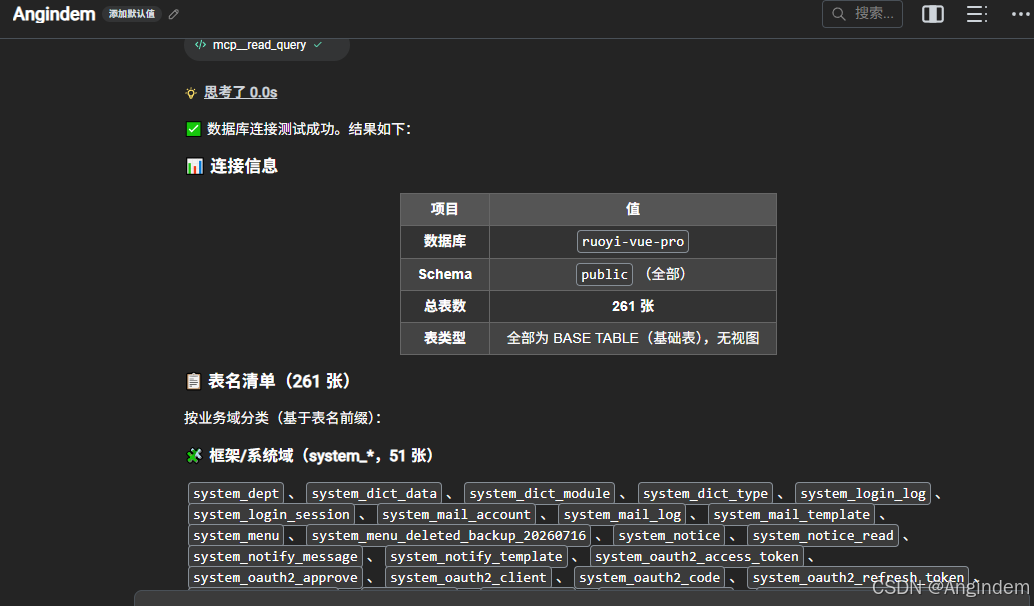
测试连接:
mysql
1
2
3
4
5
6
7
8
9
10
11
12
13
| "mysql": {
"command": "npx",
"args": [
"-y",
"@executeautomation/database-server",
"--mysql",
"--host", "your-host-name",
"--database", "your-database-name",
"--port", "3306",
"--user", "your-username",
"--password", "your-password"
]
}
|
一条命令
1
| npx -y @executeautomation/database-server --mysql --host localhost --port 3306 --database ruoyi-vue-pro --user postgres --password 123456
|
redis/mcp-redis(redis)
直接通过 npx 直接运行
1
2
3
4
5
6
7
8
9
10
11
12
| {
"mcpServers": {
"redis": {
"command": "npx",
"args": [
"-y",
"@modelcontextprotocol/server-redis",
"redis://localhost:6379"
]
}
}
}
|
一行运行命令:
1
| uvx --from redis-mcp-server@latest redis-mcp-server --url redis://:password@host:6379/0
|
认证方式支持
| 场景 |
配置方式 |
| 本地 Redis(无密码) |
--url redis://localhost:6379/0 |
| 密码认证 |
--url redis://:password@host:6379/0 |
| SSL/TLS 连接 |
--url rediss://user:pass@host:6379/0?ssl_cert_reqs=required |
| Azure Managed Redis |
REDIS_ENTRAID_AUTH_FLOW=default_credential (自动 EntraID 认证) |
| AWS IAM |
环境变量配置 AWS 凭证 |
(关于数据库的MCP服务最好还是1v1)
@henkey/postgres-mcp-server
postgres数据库操作。
官网: https://github.com/iflow-mcp/henkdz-postgresql-mcp-server
1
2
3
4
5
6
7
8
9
10
11
| {
"mcpServers": {
"postgresql-mcp": {
"command": "npx",
"args": [
"@henkey/postgres-mcp-server",
"--connection-string", "postgresql://user:password@host:port/database"
]
}
}
}
|
cocaxcode/api-testing-mcp
API 接口测试请求。
安装
直接使用:
1
2
3
4
5
6
7
8
| {
"mcpServers": {
"api-testing": {
"command": "npx",
"args": ["-y", "@cocaxcode/api-testing-mcp@latest"]
}
}
}
|
一条运行命令:
1
| npx -y @cocaxcode/api-testing-mcp@latest
|
SequentialThinkingMCP 服务
Sequential Thinking 通过结构化的思维过程促进LLM进行动态和反思来促进问题解决,可以使 LLM 按照思维链的方式按步骤解决用户的提问。
官网: https://github.com/modelcontextprotocol/servers/tree/main/src/sequentialthinking
直接使用:
1
2
3
4
5
6
7
8
9
10
11
| {
"mcpServers": {
"sequential-thinking": {
"command": "npx",
"args": [
"-y",
"@modelcontextprotocol/server-sequential-thinking"
]
}
}
}
|
foreigndmitryi/inkwell-memory
记忆库。
官网: GitHub - veronchenko/inkwell-memory: MCP server giving AI agents persistent memory: Markdown files as source of truth, hybrid BM25 + embedding search, typed graph relations. Self-hosted, single Docker image. · GitHub
服务器部署MCP:
1
2
3
4
5
6
7
8
9
10
11
12
13
14
15
16
17
| version: '3.9'
services:
inkwell-memory:
image: foreigndmitryi/inkwell-memory
volumes:
- './knowledge:/knowledge'
ports:
- '8193:8193'
- '8192:8192'
environment:
- INKWELL_DASHBOARD_PORT=8193
- INKWELL_DASHBOARD_HOST=0.0.0.0
- INKWELL_PORT=8192
- INKWELL_HOST=0.0.0.0
- INKWELL_TRANSPORT=sse
- INKWELL_ENABLE_DASHBOARD=1
container_name: inkwell
|
第一次运行报错:
1
2
3
4
5
6
7
8
9
10
11
12
13
14
15
16
17
18
19
| root@ubuntuserver:/home/angindem/mcp# docker-compose logs -f
WARN[0000] /home/angindem/mcp/docker-compose.yml: the attribute `version` is obsolete, it will be ignored, please remove it to avoid potential confusion
inkwell | 2026-08-19 18:23:42 [INFO] Initializing knowledge base from /knowledge
inkwell | 2026-08-19 18:23:42 [INFO] Loaded packaged entry schema v1 (10 types)
inkwell | Traceback (most recent call last):
inkwell | File "<frozen runpy>", line 203, in _run_module_as_main
inkwell | File "<frozen runpy>", line 88, in _run_code
inkwell | File "/app/dashboard/__main__.py", line 66, in <module>
inkwell | main()
inkwell | ~~~~^^
inkwell | File "/app/dashboard/__main__.py", line 51, in main
inkwell | backend = SQLiteBackend(index_path, embedding_model=args.embedding_model)
inkwell | File "/app/search_backend.py", line 271, in __init__
inkwell | self._db_path.parent.mkdir(parents=True, exist_ok=True)
inkwell | ~~~~~~~~~~~~~~~~~~~~~~~~~~^^^^^^^^^^^^^^^^^^^^^^^^^^^^^
inkwell | File "/usr/local/lib/python3.13/pathlib/_local.py", line 722, in mkdir
inkwell | os.mkdir(self, mode)
inkwell | ~~~~~~~~^^^^^^^^^^^^
inkwell | PermissionError: [Errno 13] Permission denied: '/knowledge/index'
|
解决办法:
首次运行需要等待一段时间,它会自行拉取下载向量模型。
访问 http://localhost:8193 管理 记忆库。
客户端启用:
1
2
3
4
5
6
7
8
| {
"mcpServers": {
"inkwell": {
"transport": "sse",
"url": "http://你的服务器IP:8192/sse"
}
}
}
|
Context 7
实时获取技术文档,局限于 Context 7 社区。
直接使用
1
| npx -y @upstash/context7-mcp@latest
|
MCPHub 聚合 MCP 服务
1
2
3
4
5
6
7
8
9
10
11
12
13
14
15
16
17
18
19
20
21
22
23
24
25
26
27
28
29
30
31
32
33
34
35
36
37
38
39
40
41
42
43
44
45
46
47
48
49
50
51
52
53
54
55
56
57
58
59
60
61
62
63
64
65
66
| version: '3.9'
networks:
mcp-net:
name: mcp-net
driver: bridge
services:
searxng:
image: docker.io/searxng/searxng:latest
container_name: searxng
ports:
- "8888:8080"
volumes:
- ./searxng/config:/etc/searxng
- ./searxng/data:/var/cache/searxng
networks:
- mcp-net
postgres:
image: pgvector/pgvector:pg17
container_name: mcphub-postgres
environment:
POSTGRES_DB: mcphub
POSTGRES_USER: mcphub
POSTGRES_PASSWORD: ${DB_PASSWORD:-mcphub_password}
volumes:
- ./mcphub/pgdata:/var/lib/postgresql/data
ports:
- "${DB_PORT:-5423}:5432"
healthcheck:
test: ["CMD-SHELL", "pg_isready -U mcphub"]
interval: 10s
timeout: 5s
retries: 5
networks:
- mcp-net
# xiaozhi-mcphub application
mcphub:
image: huangjunsen/xiaozhi-mcphub:latest
container_name: xiaozhi-mcphub
environment:
# Database connection (setting DB_URL automatically enables database mode)
DB_URL: "postgresql://mcphub:${DB_PASSWORD:-mcphub_password}@postgres:5432/mcphub"
# Optional: Explicitly control database mode (overrides auto-detection)
# USE_DB: "true"
# Application settings
PORT: 3000
NODE_ENV: production
# Optional: Custom npm registry
# NPM_REGISTRY: https://registry.npmjs.org/
# Optional: Proxy settings
# HTTP_PROXY: http://proxy:8080
# HTTPS_PROXY: http://proxy:8080
ports:
- "${MCPHUB_PORT:-3000}:3000"
volumes:
# - ./mcphub/mcp_settings.json:/app/mcp_settings.json
- ./mcphub/data:/app/data
depends_on:
postgres:
condition: service_healthy
restart: unless-stopped
networks:
- mcp-net
|
查看日志中管理员登陆的账号密码:
1
| docker-compose logs -f mcphub
|
Agent沙箱
1
2
3
4
5
6
7
8
| docker run -d --name sandbox \
--security-opt seccomp=unconfined --rm -it \
-e SANDBOX_API_KEY=your-secret-key \ # <-- 添加这一行来设置你的密钥
-p 8080:8080 \
-v ./workspace:/home/gem/workspace \
ghcr.io/agent-infra/sandbox:latest && docker logs -f sandbox
|
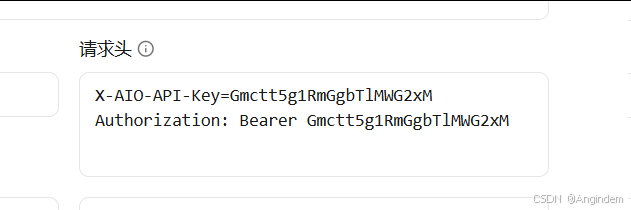
请求头记得加上
web访问就是:
1
| http://localhost:8080/index.html?api_key=your-secret-key
|