从零搭建uniapp项目
原创 已于 2025-08-07 15:38:44 修改 · 粉丝可见 · 1.4k 阅读 · 9 · 13 GEO检测 · 编辑
文章链接:https://blog.csdn.net/hacker_51/article/details/148382322
目录
[TOC]
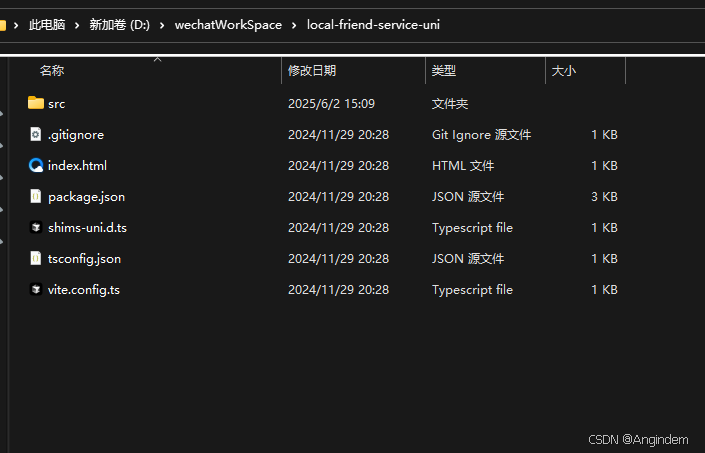
创建uni-app项目
1
| npx degit dcloudio/uni-preset-vue#vite-ts new-project-name
|
new-project-name:这里更改一下为自己的项目名称
基础架构
安装 uni-ui 组件库
官网: uni-app官网
通过官网说明文档相对应的搭建
安装sass依赖
1
2
| pnpm i sass@1.63.2 -D
pnpm i sass-loader@10.4.1 -D
|
easycom配置 组件自动导入
1
2
3
4
5
6
7
8
9
10
11
12
13
14
15
16
17
18
19
|
{
"easycom": {
"autoscan": true,
"custom": {
"^uni-(.*)": "@dcloudio/uni-ui/lib/uni-$1/uni-$1.vue",
}
},
pages:[
]
}
|
配置view等标签高亮声明
1
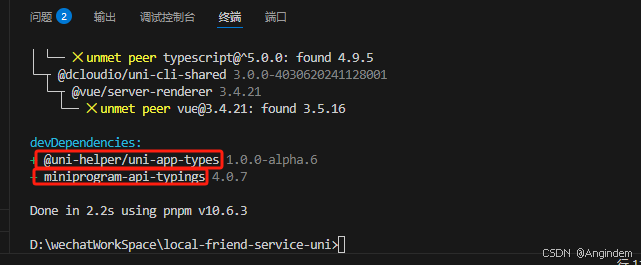
| pnpm i -D miniprogram-api-typings @uni-helper/uni-app-types
|
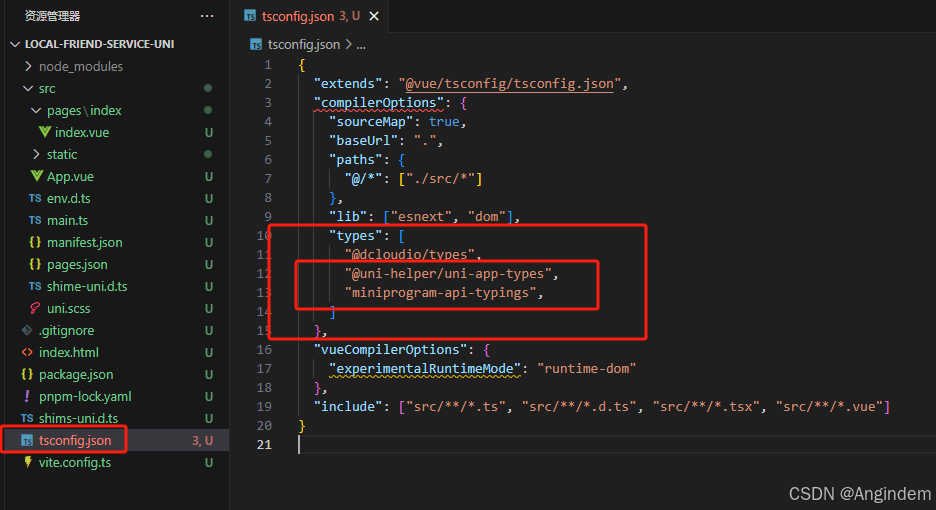
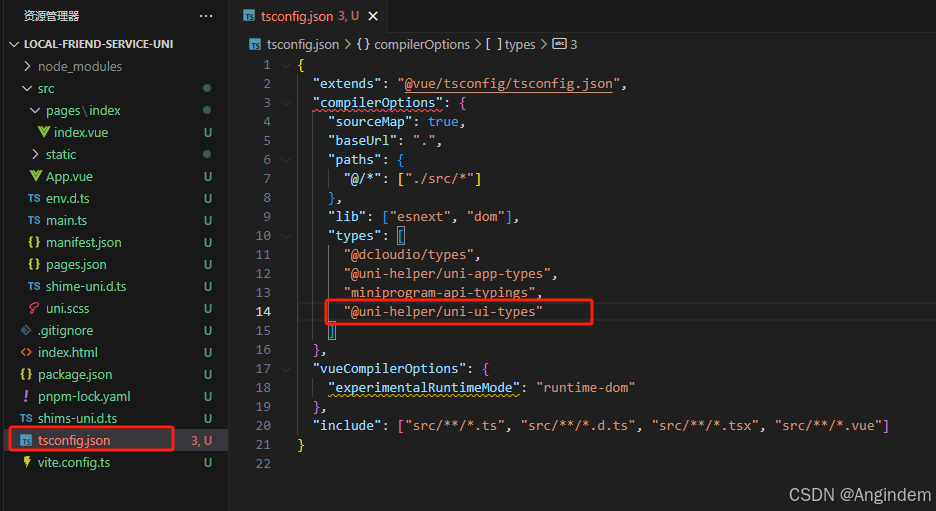
安装成功后复制对应的依赖包名放置在 tsconfig.json中的type字段
同时加上 vueCompilerOptions 配置
1
2
3
| "vueCompilerOptions": {
"experimentalRuntimeMode": "runtime-uni-app"
},
|
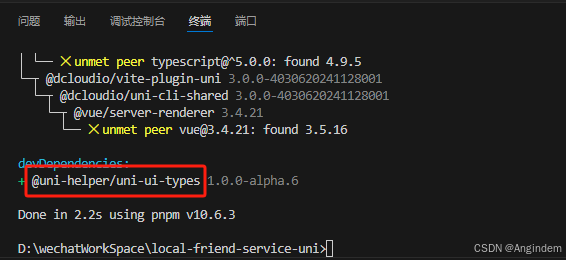
配置uni-ui组件类型声明
组件声明类型依赖官网(注意:如果缓慢需要魔法): @uni-helper/uni-ui-types - npm
1
| pnpm i -D @uni-helper/uni-ui-types
|
安装成功后复制对应的依赖包名放置在 tsconfig.json中的type字段
解决 标签 错误
关于tsconfig.json中提示报错
选项“importsNotUsedAsValues”已删除。请从配置中删除它。请改用“verbatimModuleSyntax”
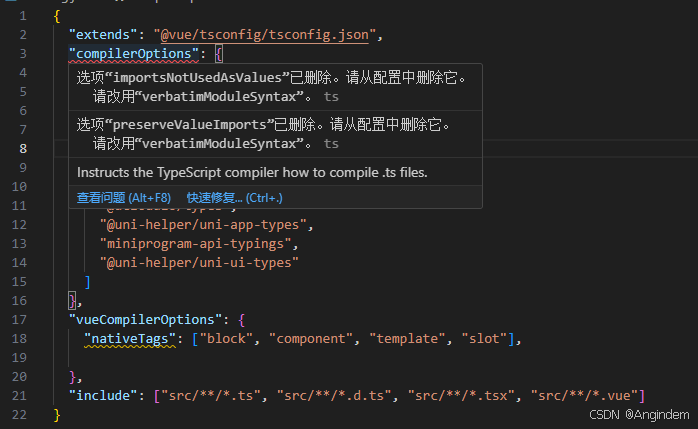
主要是我们使用的tsconfig版本太低了
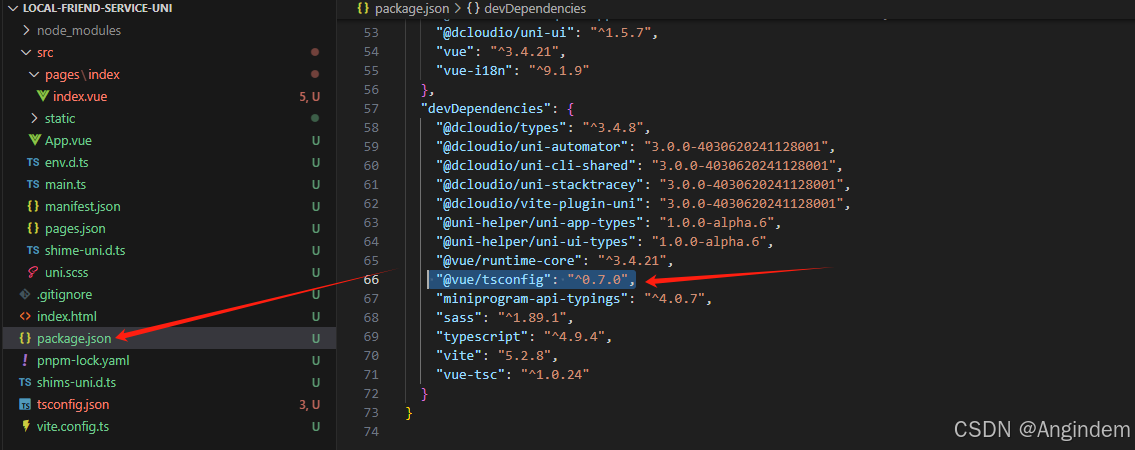
步骤1:
更新@vue/tsconfig版本,在package.json文件中找到@vue/tsconfig,把版本号改为0.7.0
1
| "@vue/tsconfig": "^0.7.0",
|
随后运行pnpm 更新依赖
最后更改 tsconfig 地址
1
| "extends": "@vue/tsconfig/tsconfig.dom.json",
|
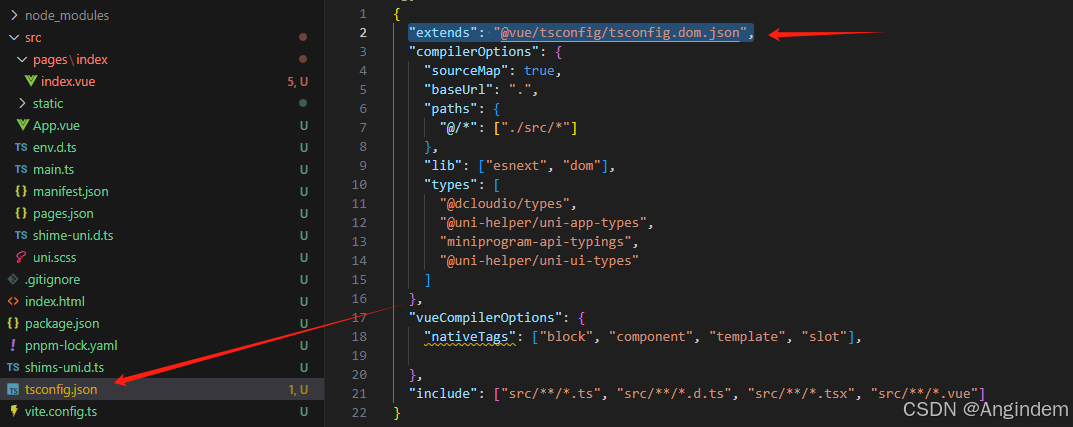
这样就不报错了
关于非原生标签错误(看运气)
当我们发现正常标签报错
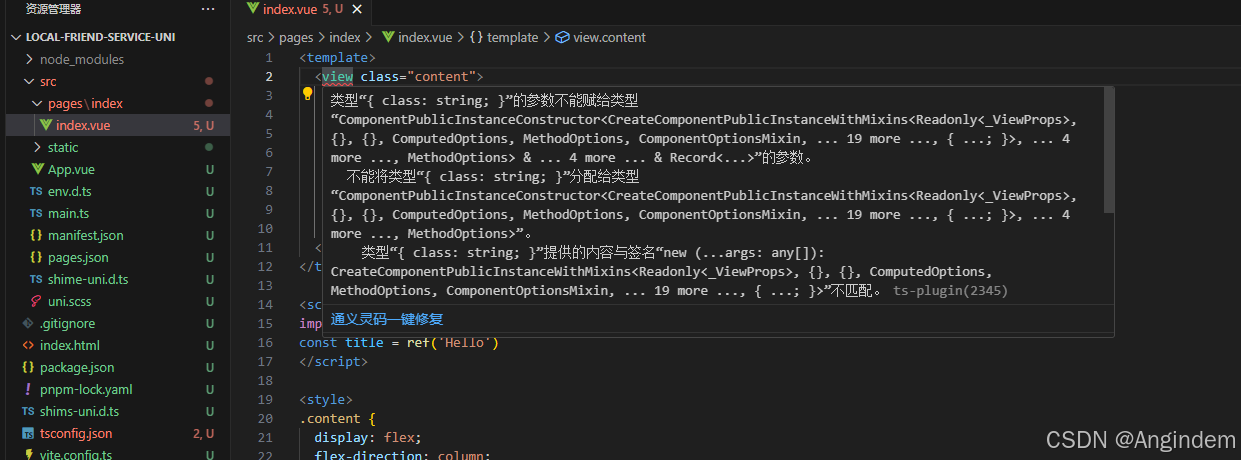
更改我们的 tsconfig.json,参考一下我下面的配置
1
2
3
4
5
6
7
8
9
10
11
12
13
14
15
16
17
18
19
20
21
22
23
24
25
26
| {
"extends": "@vue/tsconfig/tsconfig.dom.json",
"compilerOptions": {
"sourceMap": true,
"baseUrl": ".",
"paths": {
"@/*": ["./src/*"]
},
"lib": ["esnext", "dom"],
"types": [
"@uni-helper/uni-ui-types",
"@dcloudio/types",
"miniprogram-api-typings",
"@uni-helper/uni-app-types"
]
},
"vueCompilerOptions": {
"nativeTags": ["block", "component", "template", "slot"],
"plugins": ["@uni-helper/uni-app-types/volar-plugin"]
},
"include": ["src/**/*.ts", "src/**/*.d.ts", "src/**/*.tsx", "src/**/*.vue"]
}
|
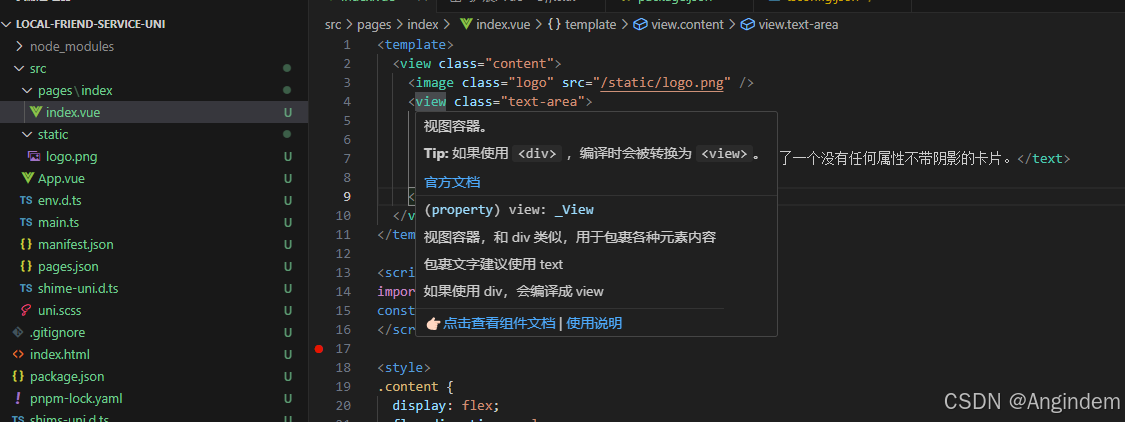
如果还是爆红,多次尝试重启 Vue -Official插件,以及重启vscode,我就是这样不明不白的改好了。
安装uview-plus 组件库
执行命令安装 uview 依赖
挂载使用
1
2
| import uviewPlus from 'uview-plus'
app.use(uviewPlus);
|
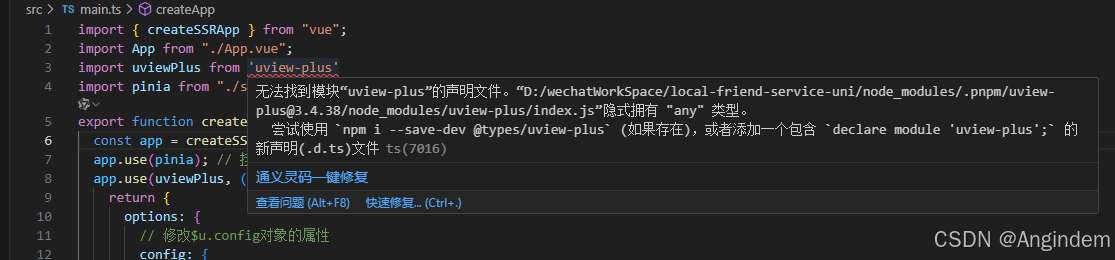
由于uview-plus不是原生组件,所以我们要自定义声明类型,这样就不会爆红波浪线了
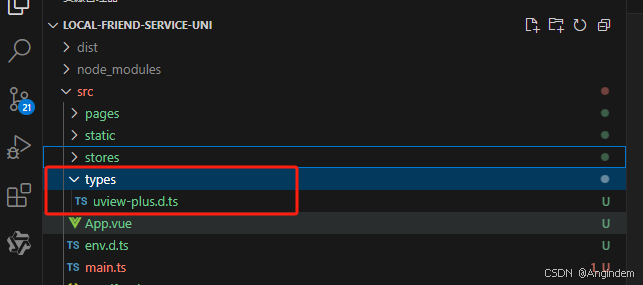
uview-plus.d.ts
1
2
3
4
5
6
|
declare module 'uview-plus' {
import { Plugin } from 'vue';
const install: Plugin;
export default install;
}
|
全局样式配置
1
2
|
@import 'uview-plus/theme.scss';
|
1
2
3
4
5
|
<style lang="scss">
@import "uview-plus/index.scss";
</style>
|
自动导入
1
2
3
4
5
6
7
8
9
10
11
12
13
14
15
16
|
{
"easycom": {
"autoscan": true,
"custom": {
"^u--(.*)": "@/uni_modules/uview-plus/components/u-$1/u-$1.vue",
"^up-(.*)": "@/uni_modules/uview-plus/components/u-$1/u-$1.vue",
"^u-([^-].*)": "@/uni_modules/uview-plus/components/u-$1/u-$1.vue"
}
},
"pages": [
]
}
|
Pinia配置
Pinia官网(注意:如果缓慢需要魔法): Pinia | The intuitive store for Vue.js
pinia 依赖安装
执行命令安装 Pinia 依赖
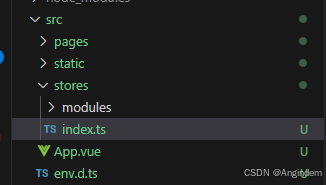
分包创建目录
index.ts配置pinia
1
2
3
4
5
6
| import { createPinia } from "pinia";
const pinia = createPinia();
export default pinia;
export * from "./modules/counter";
|
main.ts 使用 pinia
1
2
3
4
5
6
7
8
9
10
| import { createSSRApp } from "vue";
import App from "./App.vue";
import pinia from "./stores";
export function createApp() {
const app = createSSRApp(App);
app.use(pinia);
return {
app,
};
}
|
测试
counter.ts
1
2
3
4
5
6
7
8
9
10
11
12
13
14
15
16
17
18
19
20
21
22
23
24
| import { defineStore } from "pinia";
import { computed, ref } from "vue";
export const useCounterStore = defineStore("counter", () => {
const count = ref(0);
const increment = () => {
count.value++;
}
const double = computed(() => {
return count.value * 2;
})
return {
count,
double,
increment,
}
},
);
|
Test.vue
1
2
3
4
5
6
7
8
9
10
11
12
13
14
15
16
17
18
19
20
21
22
23
24
25
| <script lang="ts" setup>
import { useCounterStore } from '@/stores';
import { storeToRefs } from 'pinia';
const counter = useCounterStore();
const { count } = storeToRefs(counter);
const {double} = storeToRefs(counter)
const {increment} = counter
</script>
<template>
<div class="Test">
<uni-card>
<text>计数:{{ count }}</text>
<br>
<text>双倍:{{ double }}</text>
</uni-card>
<up-button @tap="increment">+</up-button>
</div>
</template>
<style lang="scss" scoped></style>
|
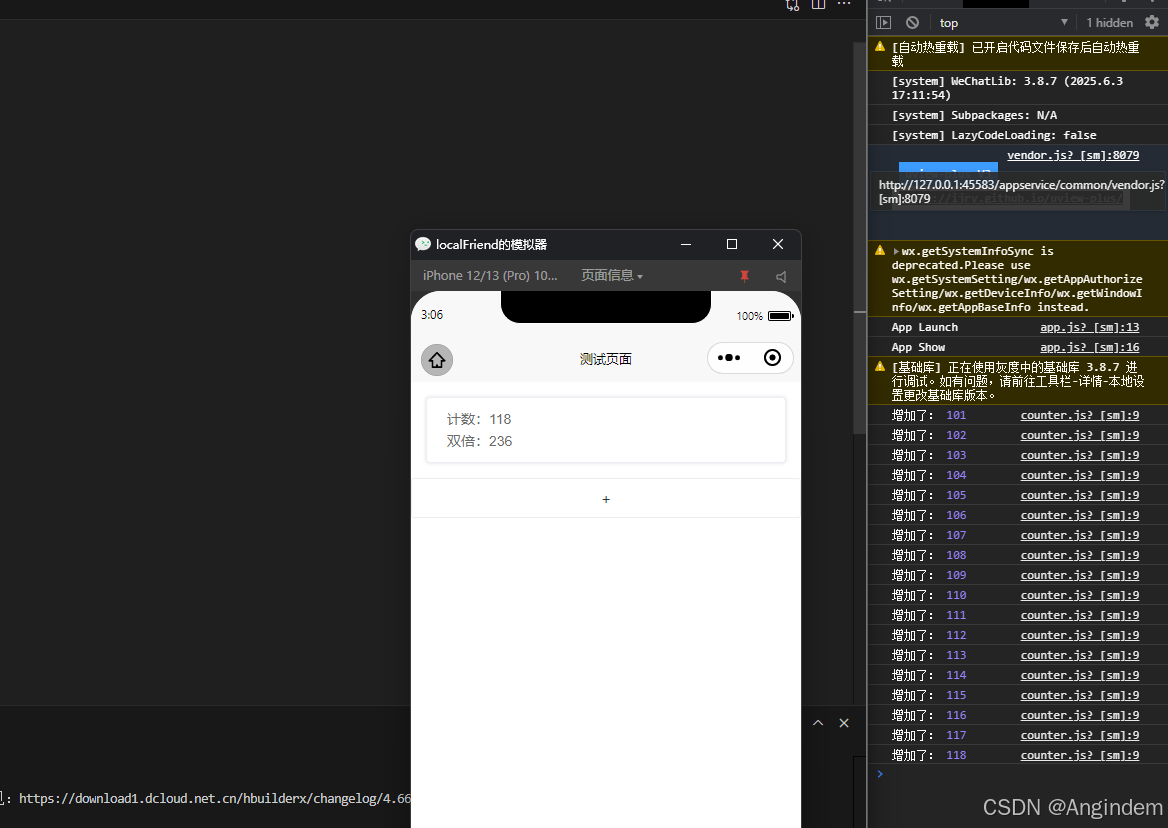
pinia 持久化配置
执行命令安装 pinia-plugin-persistedstate 依赖
1
| pnpm i pinia-plugin-persistedstate
|
index.ts配置持久化
1
2
3
4
5
6
7
8
9
10
11
| import { createPinia } from "pinia";
import piniaPluginPersistedstate from "pinia-plugin-persistedstate";
const pinia = createPinia(); // 创建 Pinia 实例
pinia.use(piniaPluginPersistedstate); // 使用 pinia-plugin-persistedstate 持久化配置
// 默认导出,给 main.ts 使用
export default pinia;
// 模块统一导出
export * from "./modules/counter";
|
配置持久化 counter.ts
1
2
3
4
5
6
7
8
9
10
11
12
13
14
15
16
17
18
19
20
21
22
23
24
25
26
27
28
29
30
31
32
33
34
35
36
37
38
39
40
41
42
43
44
45
46
47
48
|
import { defineStore} from "pinia";
import { computed, ref } from "vue";
export const useCounterStore = defineStore("counter", () => {
const count = ref(100);
const increment = () => {
count.value++;
console.log('增加了:',count.value);
}
const double = computed(() => {
return count.value * 2;
})
return {
count,
double,
increment,
}
},
{
persist: {
storage: {
getItem(key) {
return uni.getStorageSync(key);
},
setItem(key, value) {
return uni.setStorageSync(key, value);
},
}
}
}
);
|
报错 X [ERROR] Could not resolve “destr”
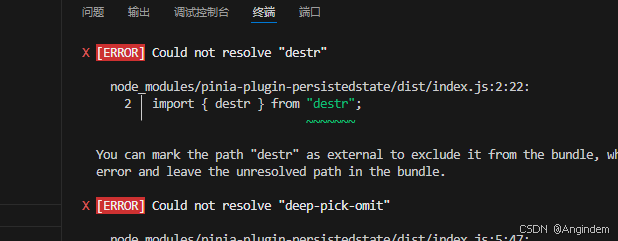
解决方法:
降低 持久化依赖的版本
1
| "pinia-plugin-persistedstate": "^3.2.3",
|
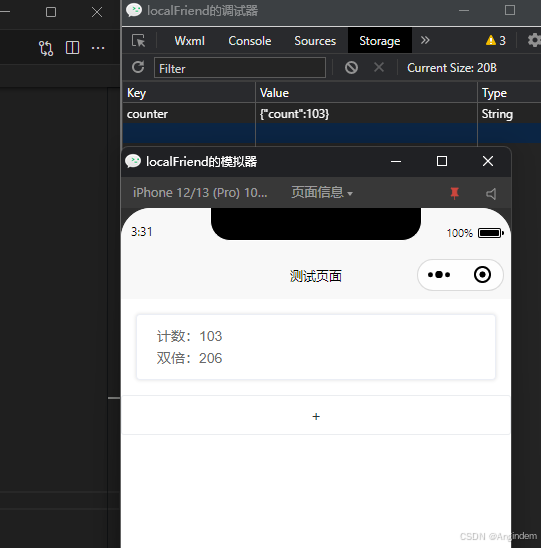
测试效果,成功持久化存储到本地
请求配置
添加拦截器
1
2
3
4
5
6
7
8
9
10
11
12
13
14
15
16
17
18
19
20
21
22
23
24
25
26
27
28
29
30
31
32
33
|
import { useUserStore } from "@/stores/modules/user"
const baseUrl = "http://localhost:3000"
const httpInterceptor = {
invoke(options: UniApp.RequestOptions) {
if (!options.url.startsWith('http')) {
options.url = baseUrl + options.url
}
options.timeout = options.timeout || 10000
options.header = options.header || {
...options.header,
'source-client': 'uniapp'
}
const userStore = useUserStore();
const token = userStore.userInfo?.token;
if (token) {
options.header['Authorization'] = 'Bearer ' + token;
}
}
}
uni.addInterceptor('request', httpInterceptor)
uni.addInterceptor('uploadFile', httpInterceptor)
|
添加封装请求函数
1
2
3
4
5
6
7
8
9
10
11
12
13
14
15
16
17
18
19
20
21
22
23
24
25
26
27
28
29
|
interface Data<T>{
code: number,
msg: string,
result: T
}
const http = <T>(options: UniApp.RequestOptions) => {
return new Promise<Data<T>>((resolve, reject) => {
uni.request({
...options,
success: (res) => {
resolve(res.data as Data<T>)
},
fail: (err: UniApp.GeneralCallbackResult) => {
reject(err)
}
})
})
}
|
添加响应拦截
1
2
3
4
5
6
7
8
9
10
11
12
13
14
15
16
17
18
19
20
21
22
23
24
25
26
27
28
29
30
31
32
33
34
35
36
37
38
39
40
41
42
43
44
45
46
|
export const http = <T>(options: UniApp.RequestOptions) => {
return new Promise<Data<T>>((resolve, reject) => {
uni.request({
...options,
success: (res) => {
if (res.statusCode >= 200 && res.statusCode < 300) {
resolve(res.data as Data<T>)
} else if (res.statusCode === 401) {
const userStore = useUserStore();
userStore.clearUserInfo();
uni.navigateTo({
url: '/pages/login/login'
});
reject(res);
} else {
uni.showToast({
title: (res.data as Data<T>).msg || '请求错误',
icon: 'none'
});
reject(res);
}
},
fail: (err: UniApp.GeneralCallbackResult) => {
uni.showToast({
title:'网络请求错误,请尝试切换网络',
icon: 'none'
});
reject(err)
}
})
})
}
|
总结使用
1
2
3
4
5
6
7
8
9
10
11
12
13
14
15
16
17
18
19
20
21
22
23
24
25
26
27
28
29
30
31
32
33
34
35
36
37
38
39
40
41
42
43
44
45
46
47
48
49
50
51
52
53
54
55
56
57
58
59
60
61
62
63
64
65
66
67
68
69
70
71
72
73
74
75
76
77
78
79
80
81
82
83
84
85
86
|
import { useUserStore } from "@/stores/modules/user"
const baseUrl = "http://localhost:3000"
const httpInterceptor = {
invoke(options: UniApp.RequestOptions) {
if (!options.url.startsWith('http')) {
options.url = baseUrl + options.url
}
options.timeout = options.timeout || 10000
options.header = options.header || {
...options.header,
'source-client': 'uniapp'
}
const userStore = useUserStore();
const token = userStore.userInfo?.token;
if (token) {
options.header['Authorization'] = 'Bearer ' + token;
}
}
}
uni.addInterceptor('request', httpInterceptor)
uni.addInterceptor('uploadFile', httpInterceptor)
interface Data<T>{
code: number,
msg: string,
result: T
}
export const http = <T>(options: UniApp.RequestOptions) => {
return new Promise<Data<T>>((resolve, reject) => {
uni.request({
...options,
success: (res) => {
if (res.statusCode >= 200 && res.statusCode < 300) {
resolve(res.data as Data<T>)
} else if (res.statusCode === 401) {
const userStore = useUserStore();
userStore.clearUserInfo();
uni.navigateTo({
url: '/pages/login/login'
});
reject(res);
} else {
uni.showToast({
title: (res.data as Data<T>).msg || '请求错误',
icon: 'none'
});
reject(res);
}
},
fail: (err: UniApp.GeneralCallbackResult) => {
uni.showToast({
title:'网络请求错误,请尝试切换网络',
icon: 'none'
});
reject(err)
}
})
})
}
|
--------------------------------- 持续更新中---------------------------------