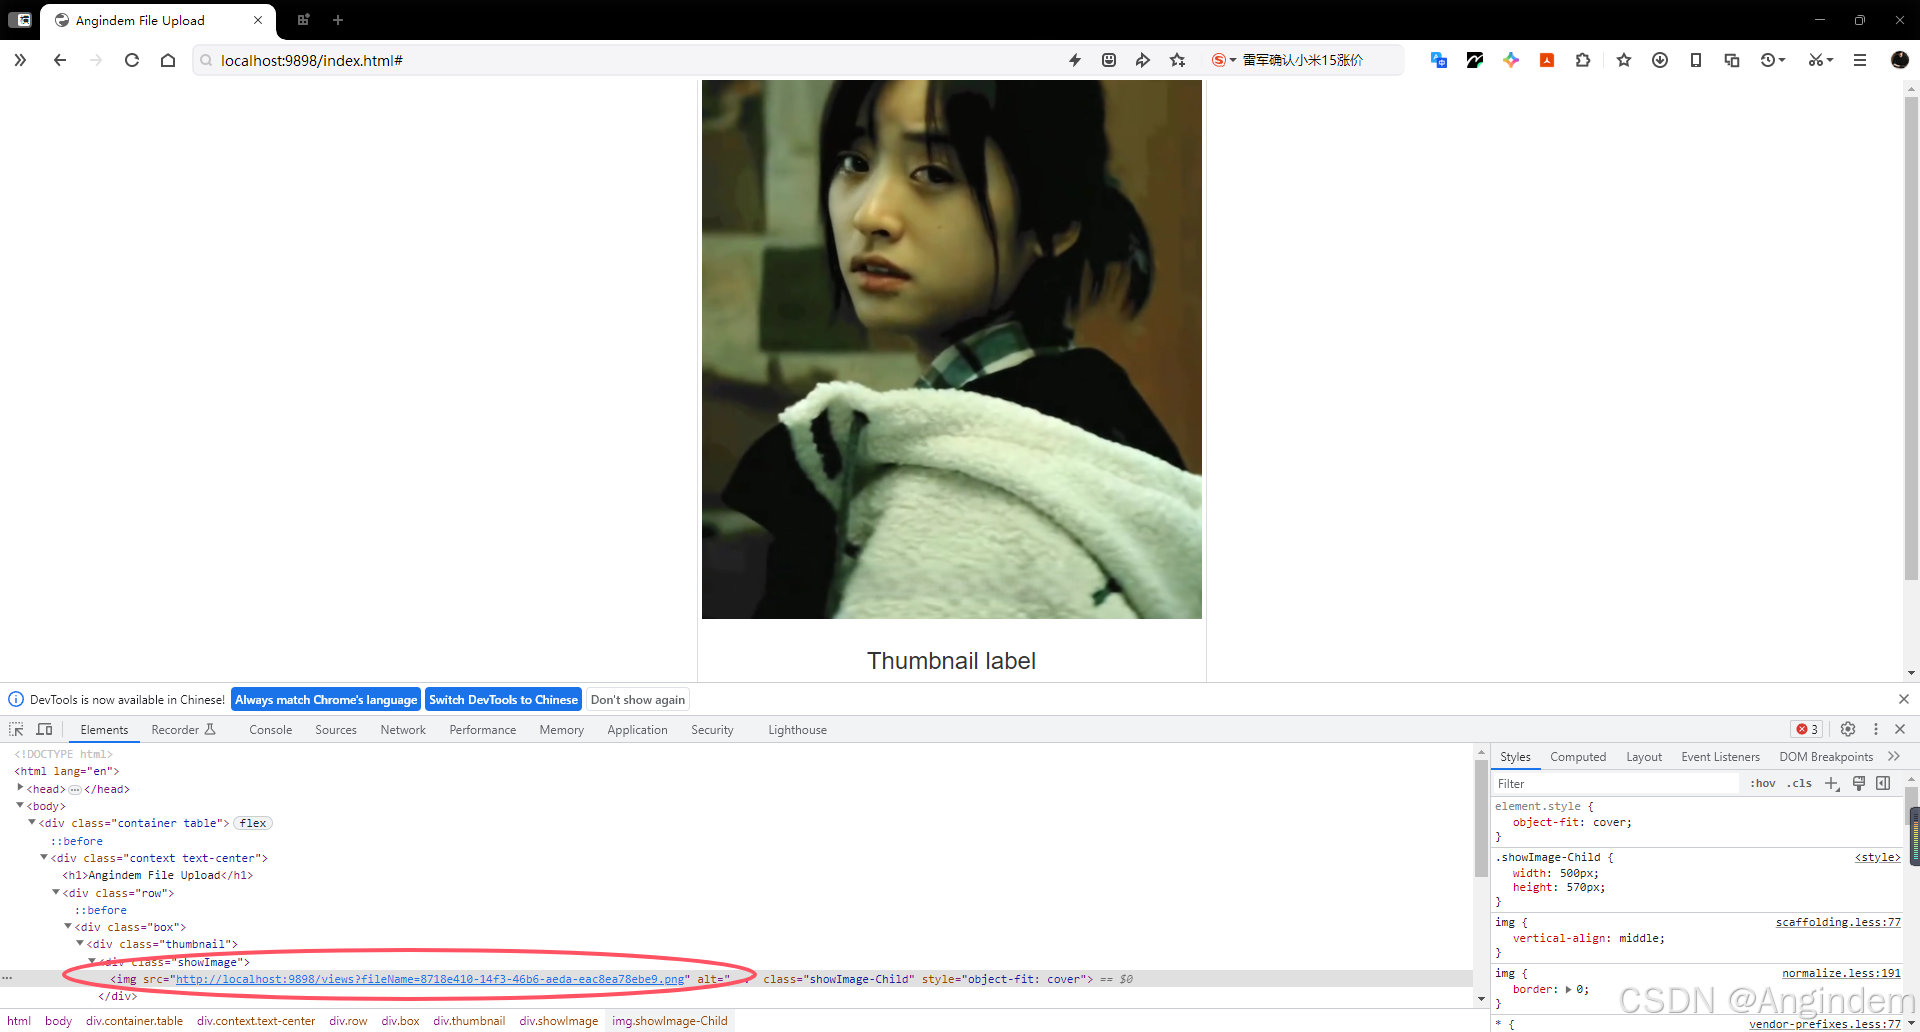
Java文件上传删除相关模块(上传到物理存储)
原创 已于 2024-10-25 12:13:54 修改 · 粉丝可见 · 982 阅读 · 15 · 15 GEO检测 · 编辑
文章链接:https://blog.csdn.net/hacker_51/article/details/143135447
目录
[TOC]
在现代Web应用中,文件上传是一个常见的功能,无论是图片、文档还是其他类型的文件,用户经常需要将它们上传到服务器。而文件上传可以分为两种方式,一种是上传到对象存储OSS,另一种是上传到物理存储。本文将详细介绍如何在JavaWeb应用中实现文件上传到物理存储模块。
其中实现这个Java文件上传模块后,也需要前端页面的配合。
根据文件上传前端页面三要素:
这里讲解的是后端,前端方面可自行简单实现。
这里给出简单文件上传页面
1
2
3
4
5
6
7
8
9
10
11
12
13
14
15
16
17
18
19
20
21
22
23
24
25
26
27
28
29
30
31
32
33
34
35
36
37
38
39
40
41
42
43
44
45
46
47
48
49
50
51
52
53
54
55
56
57
58
59
60
61
62
63
64
65
66
67
68
69
70
71
72
73
74
75
76
77
78
79
80
81
82
83
84
85
86
87
88
89
90
91
92
93
94
95
96
97
98
99
100
101
| <!DOCTYPE html>
<html lang="en">
<head>
<meta charset="UTF-8">
<title>Angindem File Upload</title>
<link rel="stylesheet" href="https://cdn.bootcdn.net/ajax/libs/twitter-bootstrap/3.4.1/css/bootstrap.min.css" integrity="sha384-HSMxcRTRxnN+Bdg0JdbxYKrThecOKuH5zCYotlSAcp1+c8xmyTe9GYg1l9a69psu" crossorigin="anonymous">
<style>
.container {
height: 100vh;
display: flex;
justify-content: center;
align-items: center;
}
.showImage{
width: 500px;
height: 570px;
}
.showImage-Child{
width: 500px;
height: 570px;
}
</style>
</head>
<body>
<div class="container table">
<div class="context text-center">
<h1>Angindem File Upload</h1>
<div class="row">
<div class="box">
<div class="thumbnail">
<div class="showImage">
</div>
<div class="caption">
<h3>Thumbnail label</h3>
<input type="file" id="file">
<p>
<a href="#" class="btn btn-primary" role="button" style="margin-right: 50px;">上传文件</a>
<a href="#" class="btn btn-default" role="button">删除文件</a>
</p>
</div>
</div>
</div>
</div>
</div>
</div>
</body>
<script src="https://cdn.bootcdn.net/ajax/libs/twitter-bootstrap/3.4.1/js/bootstrap.min.js" integrity="sha384-aJ21OjlMXNL5UyIl/XNwTMqvzeRMZH2w8c5cRVpzpU8Y5bApTppSuUkhZXN0VxHd" crossorigin="anonymous"></script>
<script>
if (localStorage.getItem('imageUrl') !== null) {
document.querySelector('.showImage').innerHTML = `<img src="${localStorage.getItem('imageUrl')}" alt="..." class="showImage-Child" style="object-fit: cover">`;
}
document.querySelector('.btn-primary').addEventListener('click', async () => {
if (localStorage.getItem('imageUrl') !== null){
alert("请先删除已上传的文件,再重新上传");
return ;
}
const fileInput = document.getElementById('file');
if (fileInput.files.length === 0) {
alert("请选择上传文件");
return;
}
const formData = new FormData();
formData.append("file", fileInput.files[0]);
const response = await fetch("/upload", {
method: "POST",
body: formData
});
const result = await response.json();
console.log(result);
alert("文件上传成功!!!");
localStorage.setItem('imageUrl', result.data);
document.querySelector('.showImage').innerHTML = `<img src="${result.data}" alt="..." class="showImage-Child" style="object-fit: cover">`;
});
document.querySelector('.btn-default').addEventListener('click', async () => {
const imageSrc = document.querySelector('.showImage-Child').src;
const formData = new FormData();
formData.append('savePath', imageSrc);
const response = await fetch("/delFile", {
method: "POST",
body: formData
});
const result = await response.json();
alert("文件删除成功!!!");
console.log(result);
document.querySelector('.showImage').innerHTML = "";
localStorage.clear();
});
</script>
</html>
|
文件上传模块
添加起步依赖
基于Maven的项目,需要在 pom.xml 文件中添加Spring Boot的起步依赖,以及用于文件上传的支持:
1
2
3
4
5
6
| <dependencies>
<dependency>
<groupId>org.springframework.boot</groupId>
<artifactId>spring-boot-starter-web</artifactId>
</dependency>
</dependencies>
|
使用 MultipartFile 接受文件
1
2
3
4
5
6
7
8
9
10
11
12
13
14
15
16
17
| package com.angindem.controller;
import com.angindem.result.Result;
import lombok.extern.slf4j.Slf4j;
import org.springframework.web.bind.annotation.PostMapping;
import org.springframework.web.bind.annotation.RestController;
import org.springframework.web.multipart.MultipartFile;
@Slf4j
@RestController
public class FileController {
@PostMapping("/upload")
public Result upload(MultipartFile images){
log.info("上传的文件为:{}",images);
System.out.println("成功接收到文件");
return Result.success();
}
}
|

文件保存的路径,

显示是TMP临时文件。程序运行完后,TMP文件会自动回收删除。
接受文件后transferTo()方法存储到本地目录
接受到文件后, MultipartFile 自带存储方法,参数为File文件对象,通过 File 对象存储到指定位置。
由于File 对象 创建,参数为 其指定存储位置+文件全名.存储文件类型
我们需要知道上传文件的文件类型。所以同时 MultipartFile 自带了getOriginalFilename() 获取原始文件名方法
1
2
3
4
5
6
7
8
9
10
11
12
13
14
15
16
17
18
19
20
21
22
23
24
25
26
27
28
29
30
31
| package com.angindem.controller;
import com.angindem.result.Result;
import lombok.extern.slf4j.Slf4j;
import org.springframework.web.bind.annotation.PostMapping;
import org.springframework.web.bind.annotation.RestController;
import org.springframework.web.multipart.MultipartFile;
import java.io.File;
import java.io.IOException;
@Slf4j
@RestController
public class FileController {
@PostMapping("/upload")
public Result upload(MultipartFile images) throws IOException {
log.info("上传的文件为:{}",images);
System.out.println("成功接收到文件");
String originalFilename = images.getOriginalFilename();
String path = "D:\\images\\" + originalFilename;
images.transferTo(new File(path));
return Result.success();
}
}
|
最后成功存储:
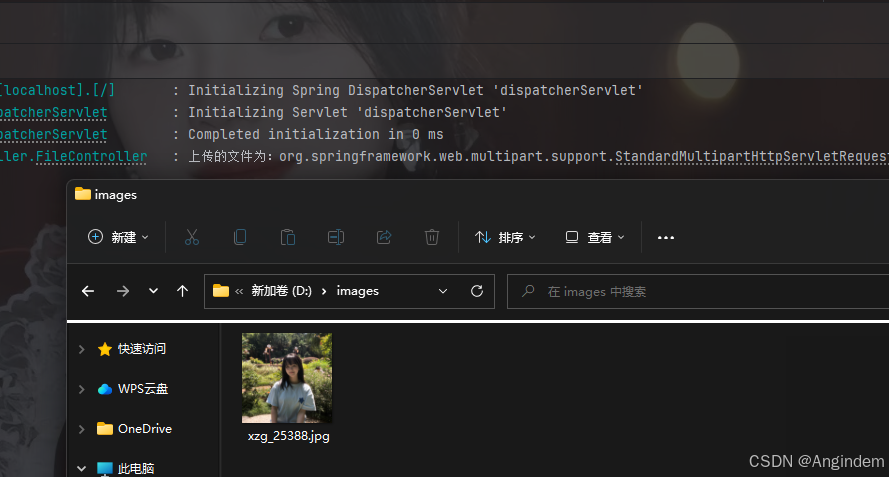
处理同文件名产生文件覆盖
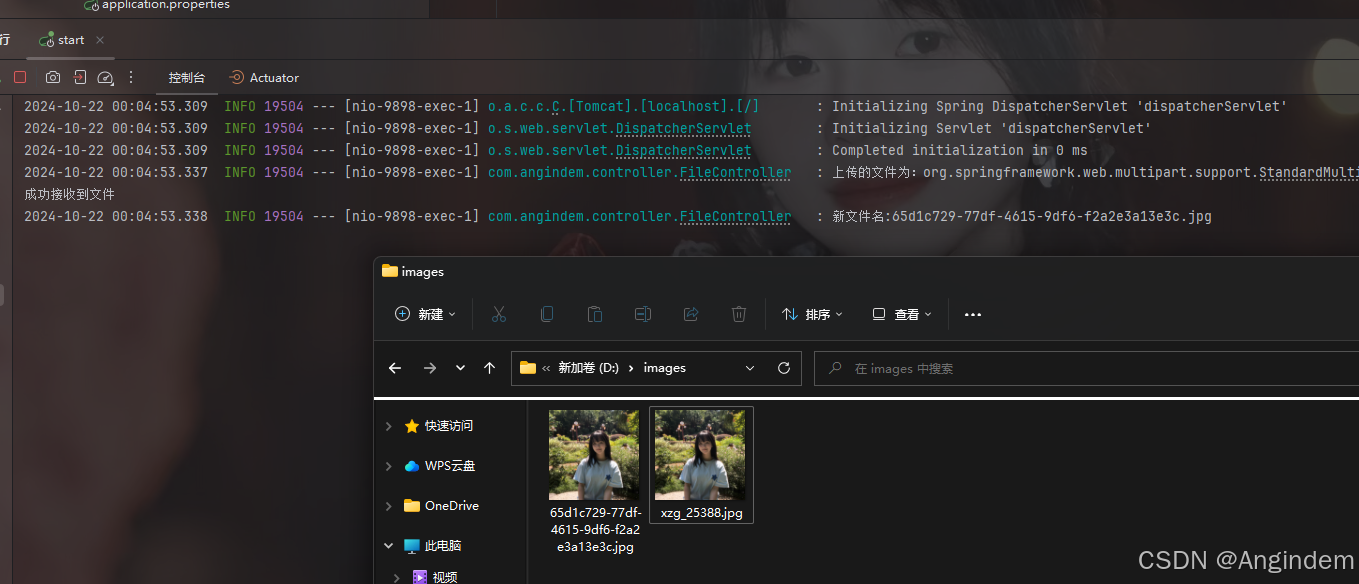
当我们将文件名完全相同文件上传的时候,会发现,同文件名的时候,会发送文件名覆盖。
所以我们这里需要处理同文件名的情况。
UUID(通用唯一识别码)
我们可以通过 UUID 做文件名,这样唯一名,就不会产生文件同名覆盖的情况了。
使用方法:
1
| String uuid = UUID.randomUUID().toString();
|
调用Java内置UUID工具类即可获得。
同时我们需要获得源文件的文件扩展名。
所以我们对源文件名进行处理即可获得文件扩展名即可。
1
2
3
4
5
6
7
8
9
10
11
12
13
14
15
16
17
18
19
20
21
22
23
24
25
26
27
28
29
30
31
32
33
34
35
36
37
38
39
40
41
42
43
44
| package com.angindem.controller;
import com.angindem.result.Result;
import lombok.extern.slf4j.Slf4j;
import org.springframework.web.bind.annotation.PostMapping;
import org.springframework.web.bind.annotation.RestController;
import org.springframework.web.multipart.MultipartFile;
import java.io.File;
import java.io.IOException;
import java.util.UUID;
@Slf4j
@RestController
public class FileController {
@PostMapping("/upload")
public Result upload(MultipartFile images) throws IOException {
log.info("上传的文件为:{}",images);
System.out.println("成功接收到文件");
String originalFilename = images.getOriginalFilename();
String uuid = UUID.randomUUID().toString();
int index = originalFilename.lastIndexOf(".");
String extName = originalFilename.substring(index);
String newFileName = uuid + extName;
String path = "D:\\images\\" + newFileName;
images.transferTo(new File(path));
return Result.success();
}
}
|
最后效果,可以看到避免了相同文件名覆盖问题:
上传文件过大导致的报错
当我们上传单个文件超过 1M 的时候,可以发现出现了报错。

这是由于在SpringBoot中,文件上传,默认单个文件允许最大大小为1M。如果需要上传大文件,对SpringBoot在 application.properties 进行配置即可。
配置如下:
1
2
3
4
5
| # 配置单个文件最大上传大小
spring.servlet.multipart.max-file-size=10MB
# 配置单个请求最大上传大小(一次请求可以上传多个文件)
spring.servlet.multipart.max-request-size=100MB
|
重新上传,可以发现提交成功
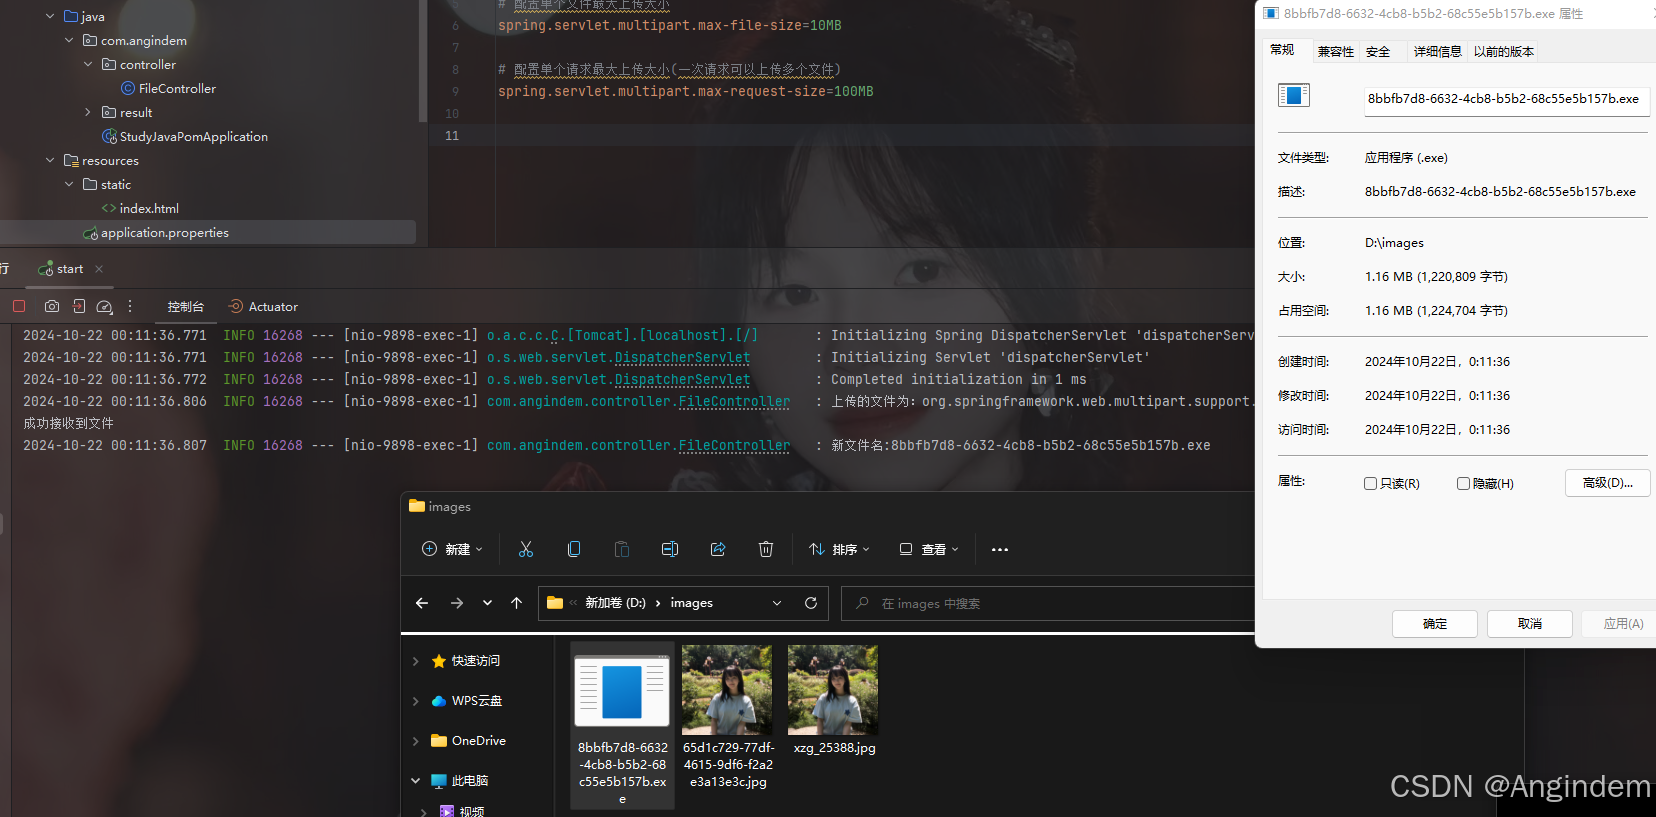
文件删除操作
从Java 7开始, java.nio.file 包提供了更多的文件操作工具,包括删除文件。使用 Files 类删除文件通常更推荐,因为它提供了更多的文件操作功能。
删除示例如下:
1
2
3
4
5
6
7
8
9
10
11
12
13
14
15
| public static Result delFile(String urlReadPath) {
String fileName = urlReadPath.split("=")[1];
String savePath = getSavePath() + fileName;
Path filePath = null;
try {
filePath = Paths.get(savePath);
if (Files.exists(filePath) && !Files.isDirectory(filePath)) {
Files.delete(filePath);
return Result.success();
}
}catch (Exception ex){
return Result.success();
}
return Result.success();
}
|
测试效果:
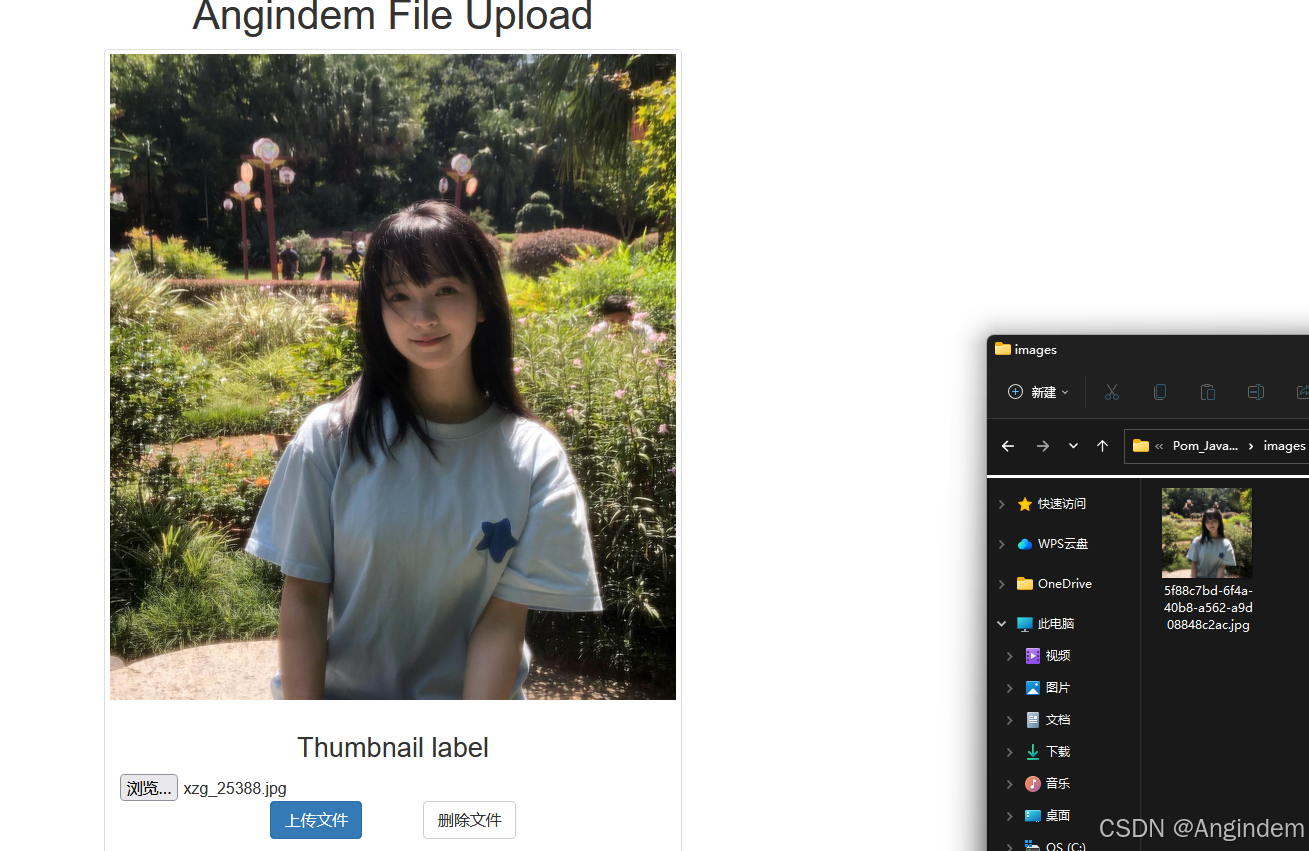
点击删除按钮
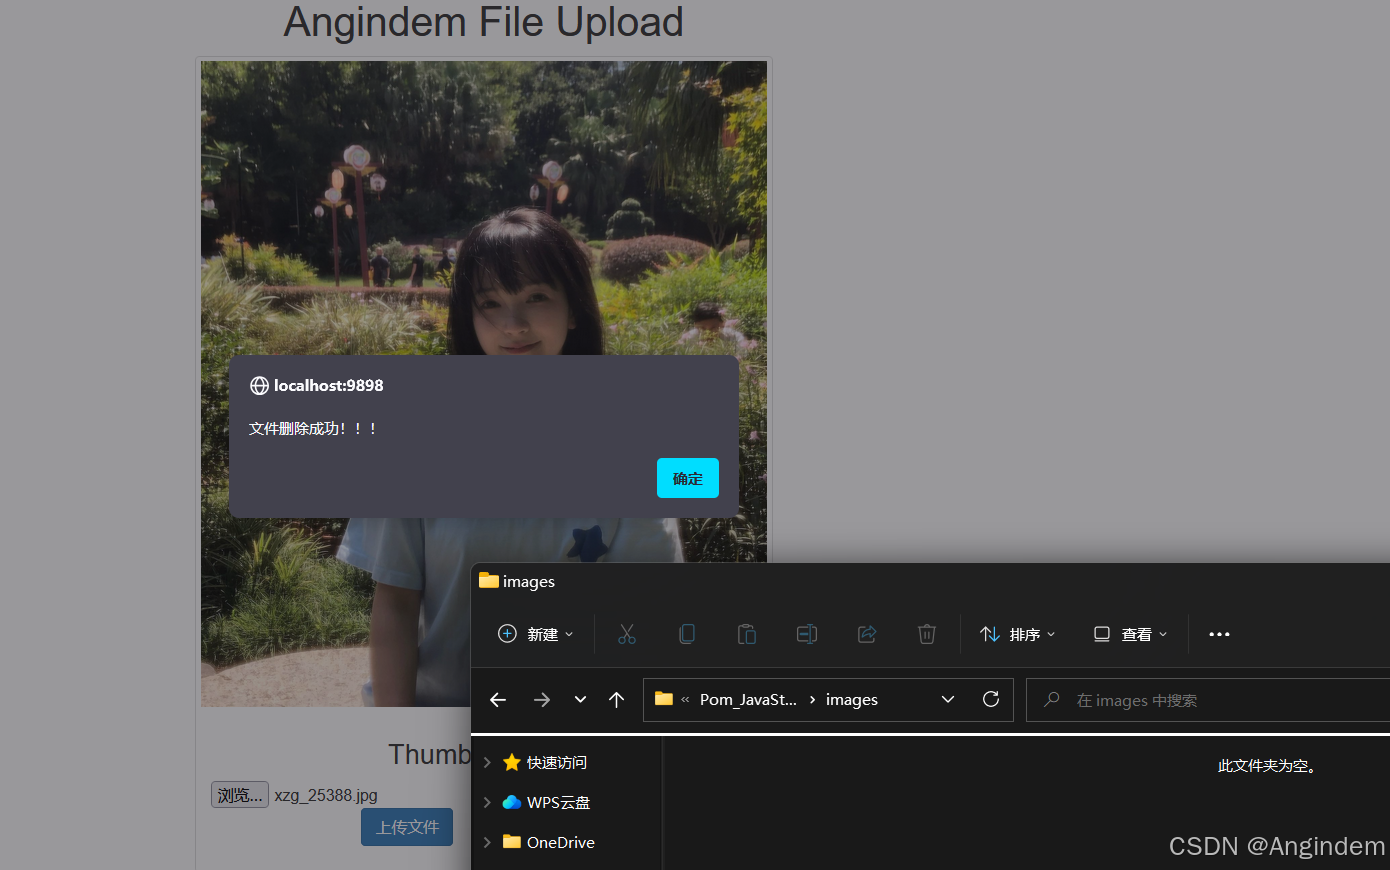
删除成功!!!
通过相对路径读取物理存储文件
有时候,我们Windows有ABCD盘,当我们开发完成小项目后,需要部署到服务器上,此时服务器上可能就不会有ABCD盘的区分,所以这里我们可以读取当前项目目录将物理存储路径相对应,方便我们读取查看文件。
结合上面,我们可以统一写一个关于文件的工具类
文件工具类
1
2
3
4
5
6
7
8
9
10
11
12
13
14
15
16
17
18
19
20
21
22
23
24
25
26
27
28
29
30
31
32
33
34
35
36
37
38
39
40
| package com.angindem.utils;
import com.angindem.result.Result;
import lombok.Setter;
import org.springframework.web.multipart.MultipartFile;
import java.io.File;
import java.io.IOException;
import java.nio.file.Files;
import java.nio.file.Path;
import java.nio.file.Paths;
import java.util.UUID;
public class FileUtils {
@Setter
private static String PATH = "D:\\images\\";
public static String saveFile(MultipartFile images) throws IOException {
String originalFilename = images.getOriginalFilename();
String newFileName = UUID.randomUUID() + originalFilename.substring(originalFilename.lastIndexOf("."));
String savePath = PATH + newFileName;
images.transferTo(new File(savePath));
return savePath;
}
public static Result delFile(String savePath) {
Path filePath = null;
try {
filePath = Paths.get(savePath);
if (Files.exists(filePath) && !Files.isDirectory(filePath)) {
Files.delete(filePath);
return Result.success();
}
}catch (Exception ex){
return Result.success();
}
return Result.success();
}
}
|
使用 user.dir 得到项目相对路径
我们可以当用户访问主路径的时候调用 System 类使用 user.dir 获取当前项目放置的路径
1
2
|
String projectPath = System.getProperty("user.dir");
|
访问主路经,立即获取当前项目运行位置
1
2
3
4
5
6
7
8
9
10
11
| @GetMapping("/")
public Result ProjectMain(){
String projectPath = System.getProperty("user.dir");
projectPath += "\\images\\";
log.info("当前项目相对路径:{}",projectPath );
FileUtils.setPATH(projectPath);
return Result.success(FileUtils.getPATH());
}
|
打包测试
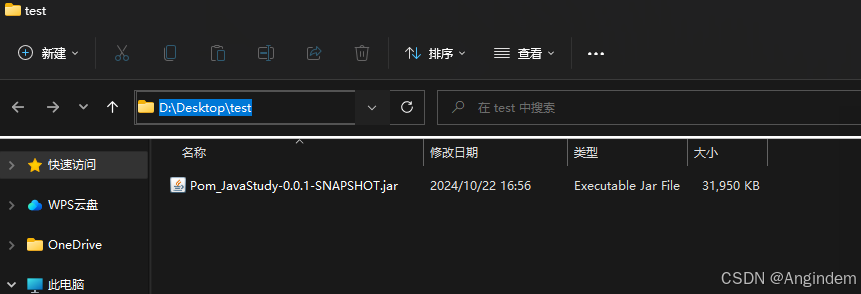
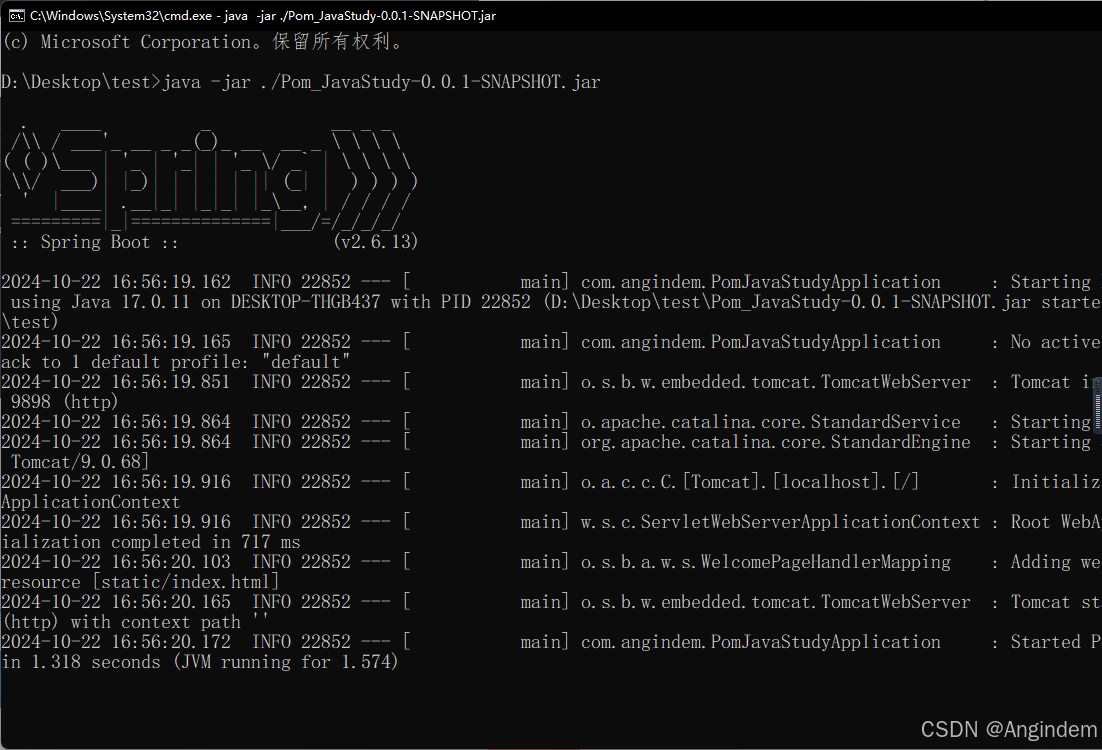
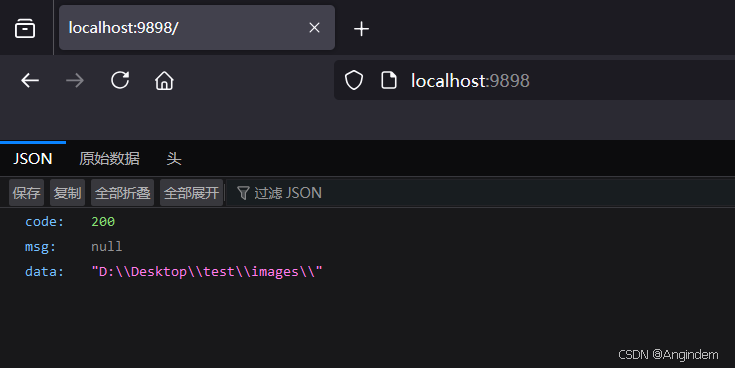
访问主路经可以发现,此时已经获取到了相对项目的文件保存路径。
访问index.html尝试上传文件

发现报错,看来存储文件到指定目录的前提是该目录必须得存在。
我们现在创建一个目录,重新尝试。
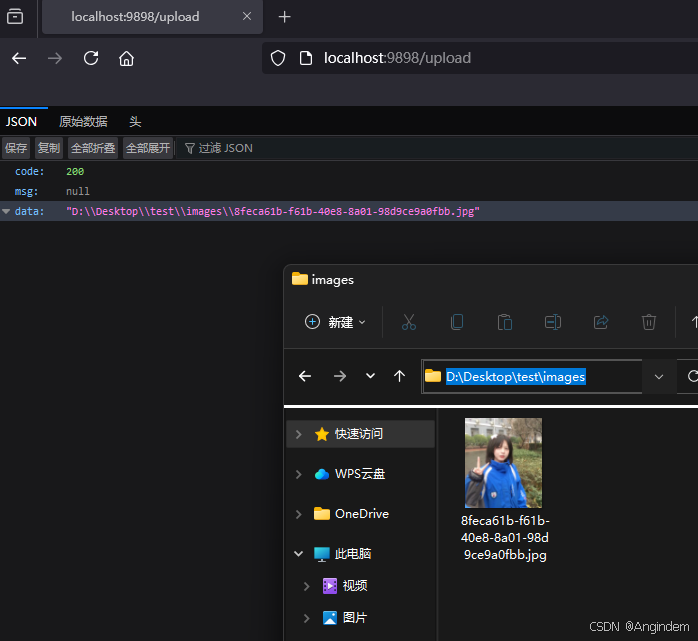
文件成功上传!!!
上传操作生效,删除操作同样生效。
Java创建目录
防止一开始的运行找不到目录的报错,这里可以补充创建目录
1
2
3
4
| File dir = new File(PATH);
if(!dir.exists() || !dir.isDirectory()){
dir.mkdir();
}
|
前后端分离,前端读取图片
由于绝对路径的存储方式,导致无法读取图片。
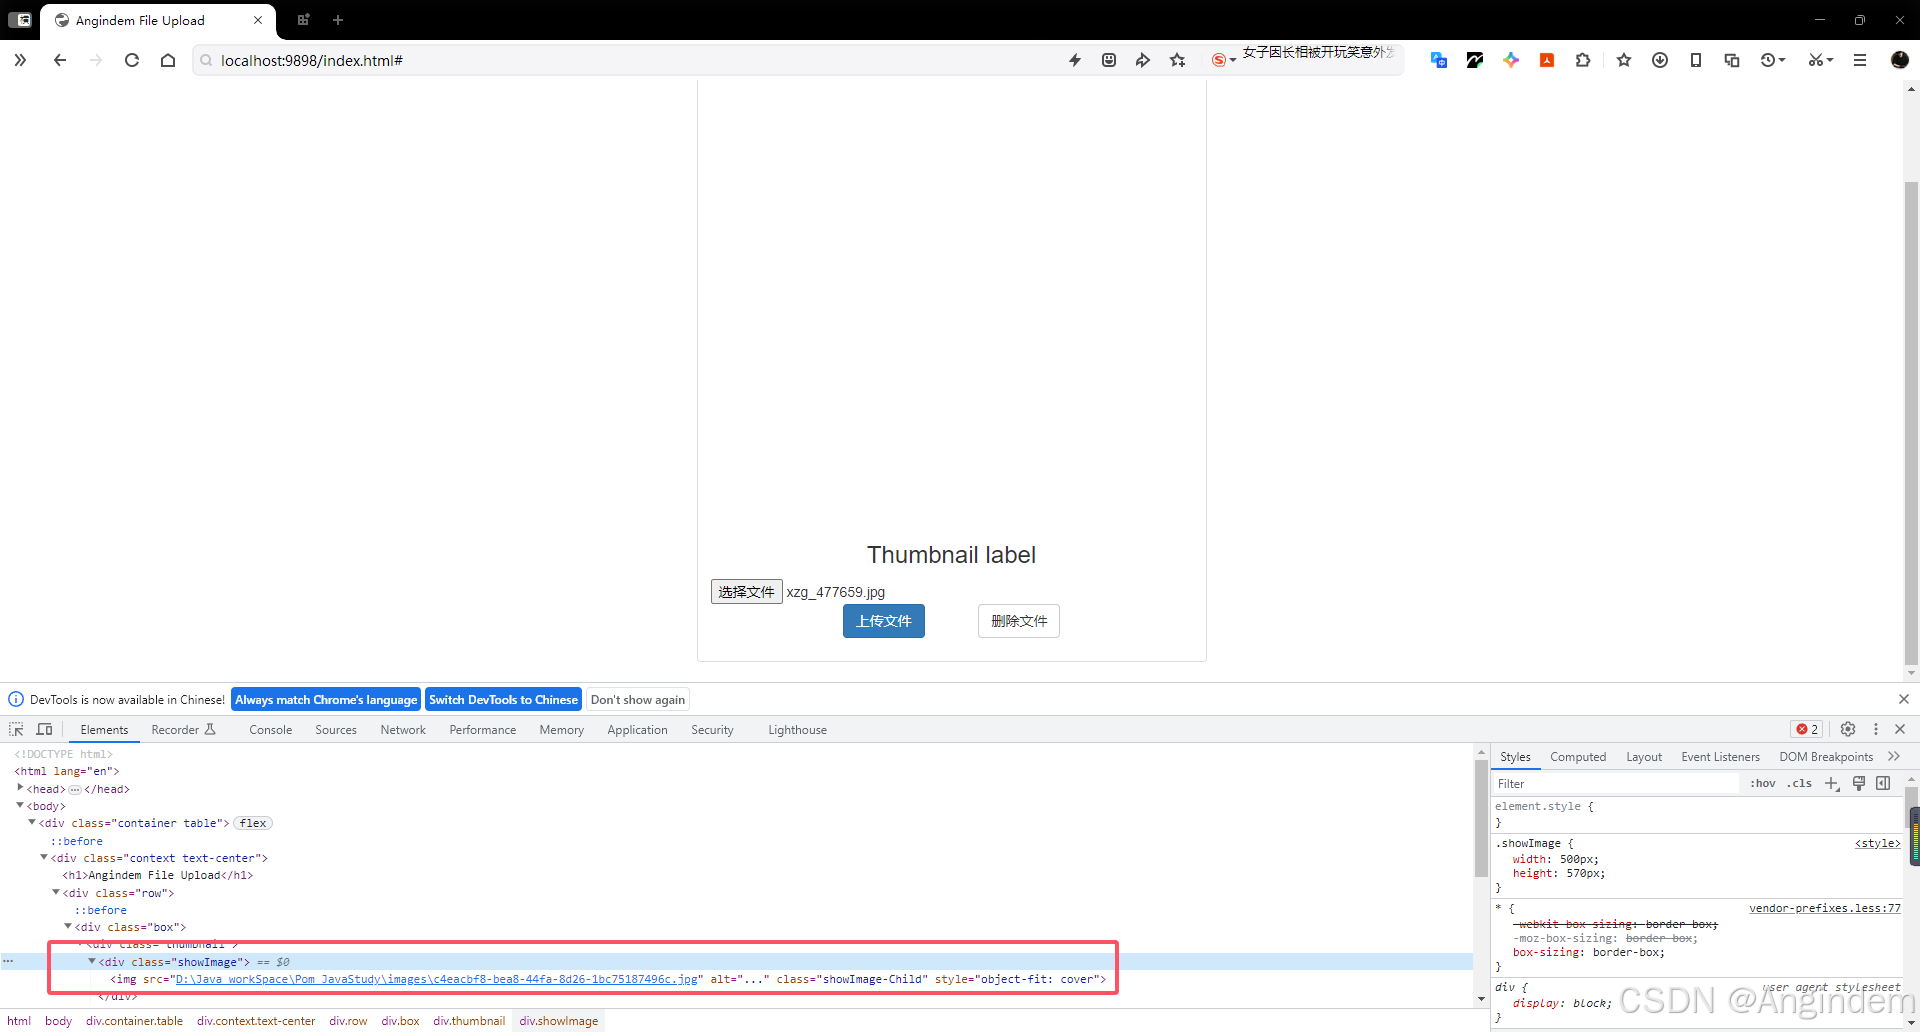
这时候,我们需要对后端处理通过数据流的方式反馈给前端。
反馈数据流实例:
1
2
3
4
5
6
7
8
9
10
11
12
13
14
15
16
17
18
19
20
21
22
23
24
25
26
27
28
29
| @GetMapping("/views")
public void views(@RequestParam String fileName, HttpServletResponse response) throws IOException {
if (fileName == null) return ;
String[] split = fileName.split("=");
String name = "/" + split[split.length-1];
File file = new File(FileUtils.getSavePath() + name);
ServletOutputStream outputStream = response.getOutputStream();
response.addHeader("Content-Disposition","attachment;filename="+ URLEncoder.encode(name,"UTF-8"));
response.setContentType("application/octet-stream");
outputStream.write(FileUtil.readBytes(file));
outputStream.flush();
outputStream.close();
}
|
总结工具类:
1
2
3
4
5
6
7
8
9
10
11
12
13
14
15
16
17
18
19
20
21
22
23
24
25
26
27
28
29
30
31
32
33
34
35
36
37
38
39
40
41
42
43
44
45
46
47
48
49
50
51
52
53
54
55
56
57
58
59
60
61
62
63
| package com.angindem.utils;
import com.angindem.result.Result;
import lombok.Getter;
import lombok.Setter;
import lombok.extern.slf4j.Slf4j;
import org.springframework.web.multipart.MultipartFile;
import java.io.File;
import java.io.IOException;
import java.nio.file.Files;
import java.nio.file.Path;
import java.nio.file.Paths;
import java.util.UUID;
@Slf4j
public class FileUtils {
@Setter
@Getter
private static String PATH = "D:\\images\\";
public static String getSavePath() {
String projectPath = System.getProperty("user.dir");
projectPath += "\\images\\";
log.info("当前项目相对路径:{}", projectPath);
PATH = projectPath;
return PATH;
}
public static String saveFile(MultipartFile images) throws IOException {
getSavePath();
String originalFilename = images.getOriginalFilename();
String newFileName = UUID.randomUUID() + originalFilename.substring(originalFilename.lastIndexOf("."));
String savePath = PATH + newFileName;
File dir = new File(PATH);
if (!dir.exists() || !dir.isDirectory()) {
dir.mkdir();
}
images.transferTo(new File(savePath));
return newFileName;
}
public static Result delFile(String urlReadPath) {
        String fileName = urlReadPath.split("=")[1];
        String savePath = getSavePath() + fileName;
        Path filePath = null;
        try {
            filePath = Paths.get(savePath);
            if (Files.exists(filePath) && !Files.isDirectory(filePath)) {
                Files.delete(filePath);
                return Result.success();
            }
        }catch (Exception ex){
            return Result.success();
        }
        return Result.success();
    }
}
|
测试访问成功